Climbing Peonies

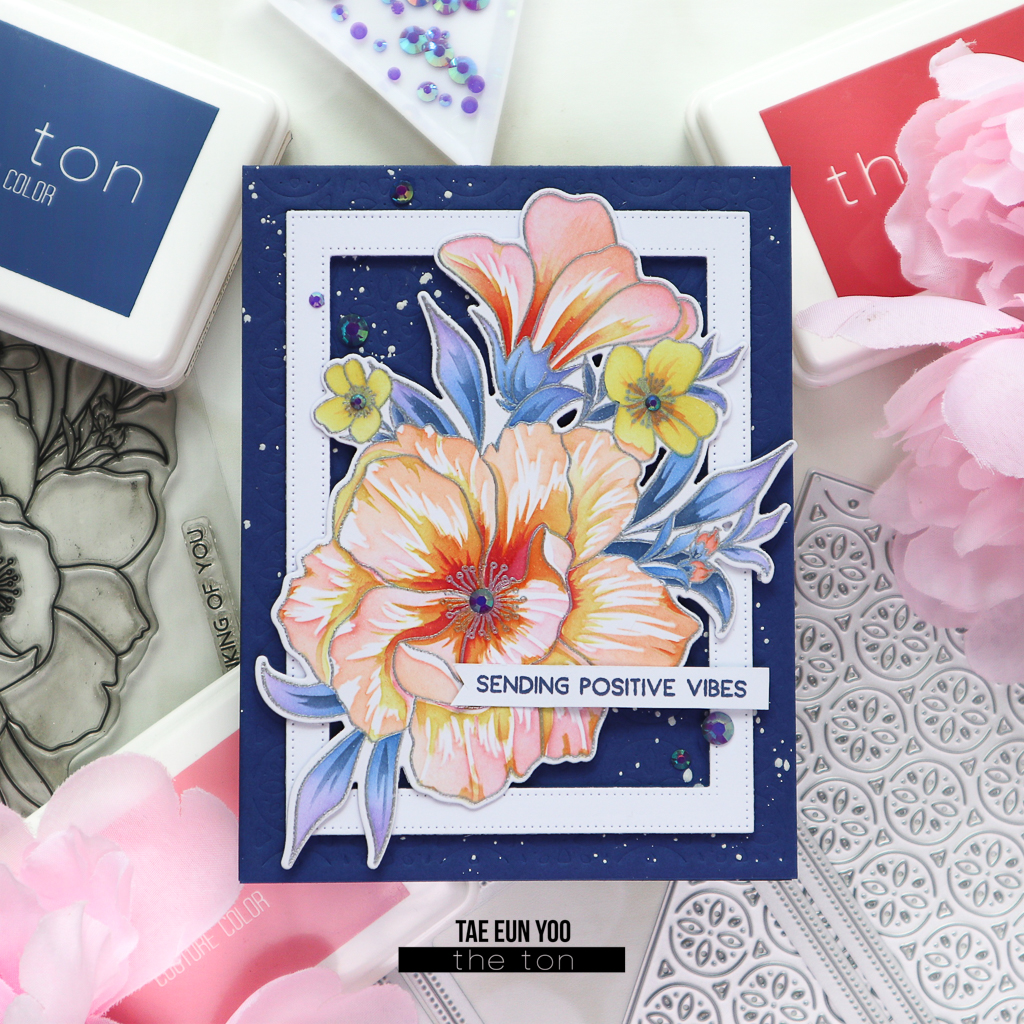
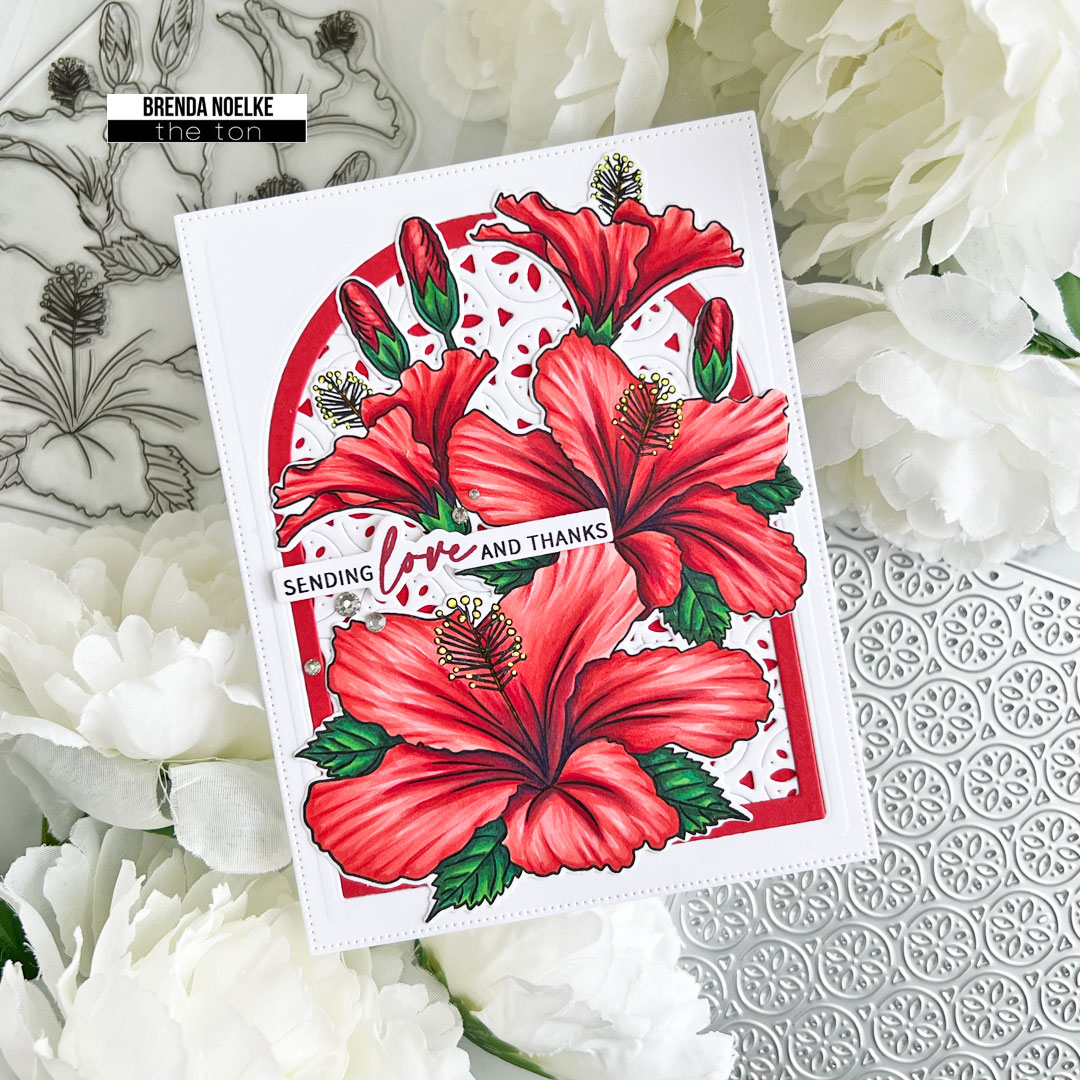
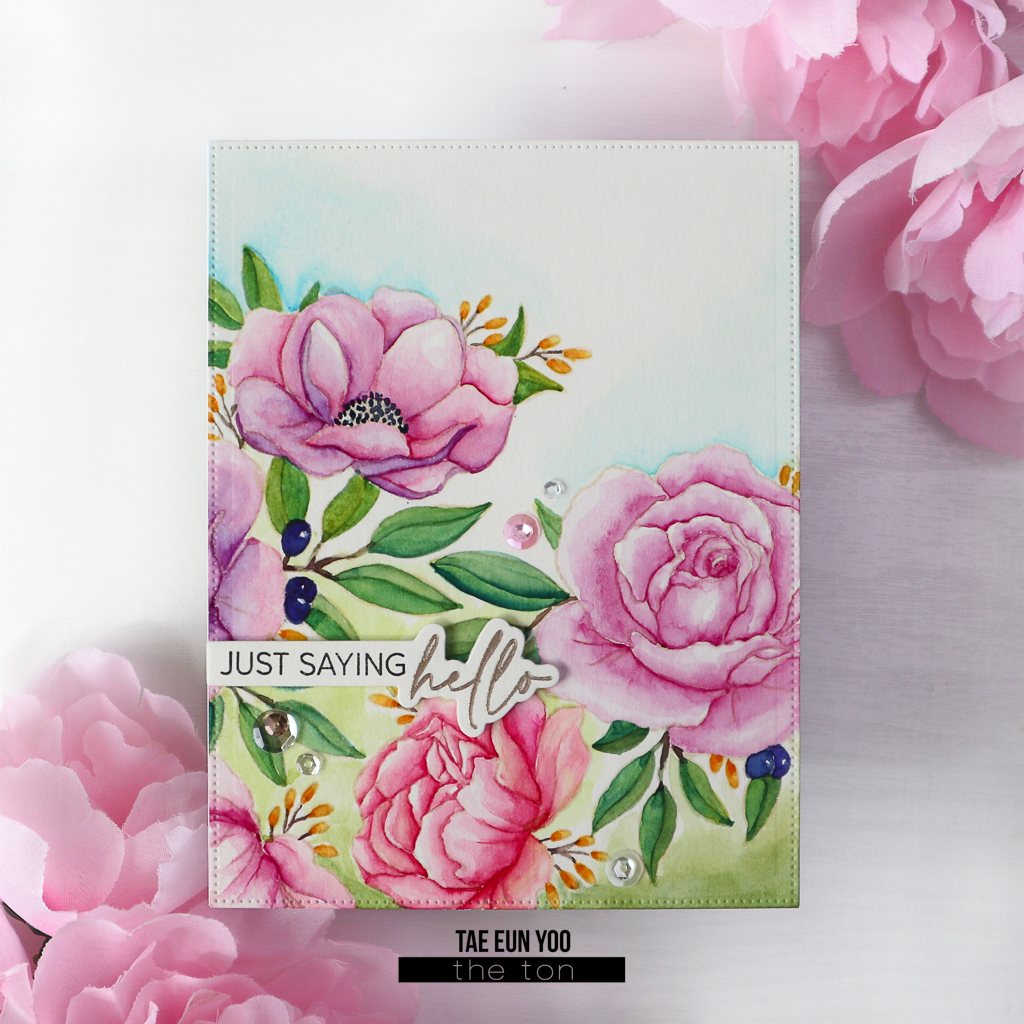
Hello everyone! Hope you’re having a great week so far! It’s TaeEun here today with a stenciled floral card. I pulled out the Coming Up Peonies stamp and the Climbing Peonies Layering stencil set to make today’s card. My favorite colors for flowers are coral pink, blue, and purple, but for this card, I stenciled the peonies in pinkish red. I have to admit that the layering stencils make cardmaking so much faster and easier, even though I really love to color the flowers myself 🙂 ! 

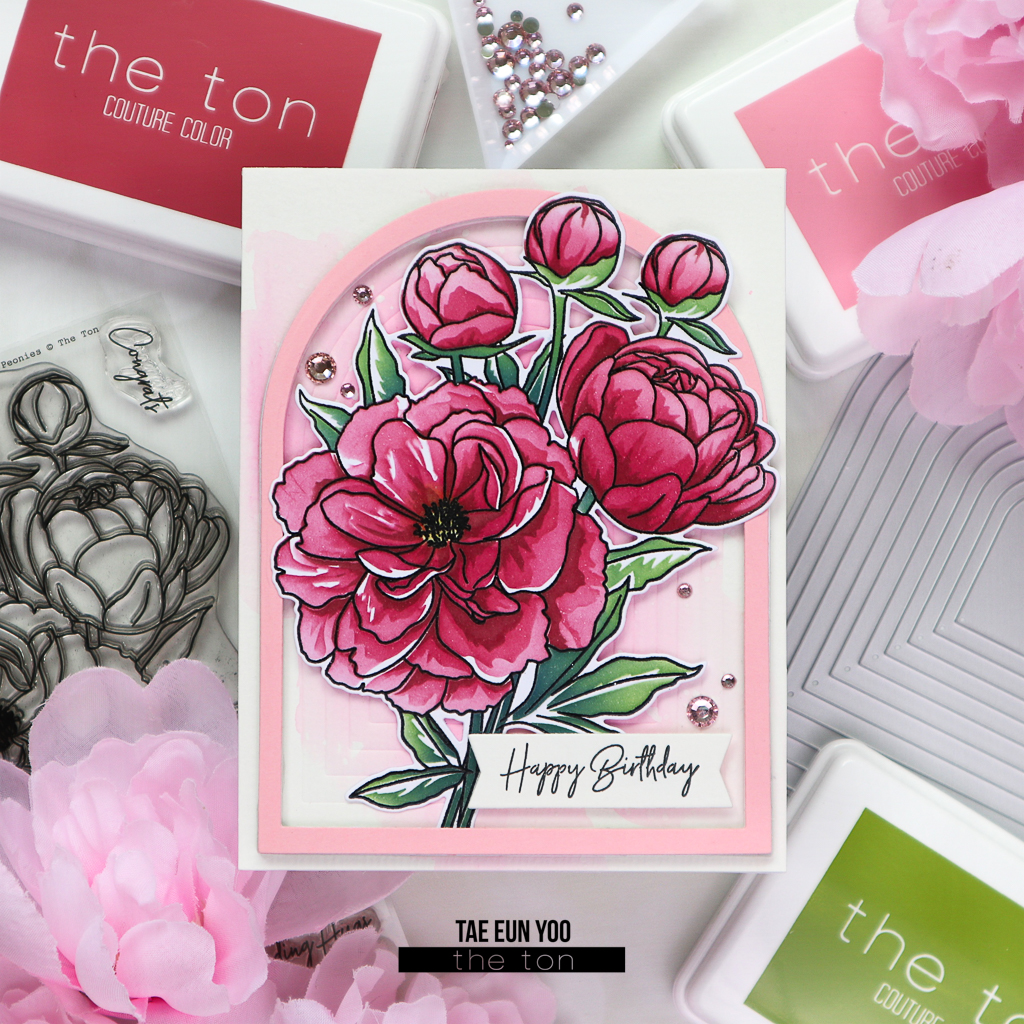
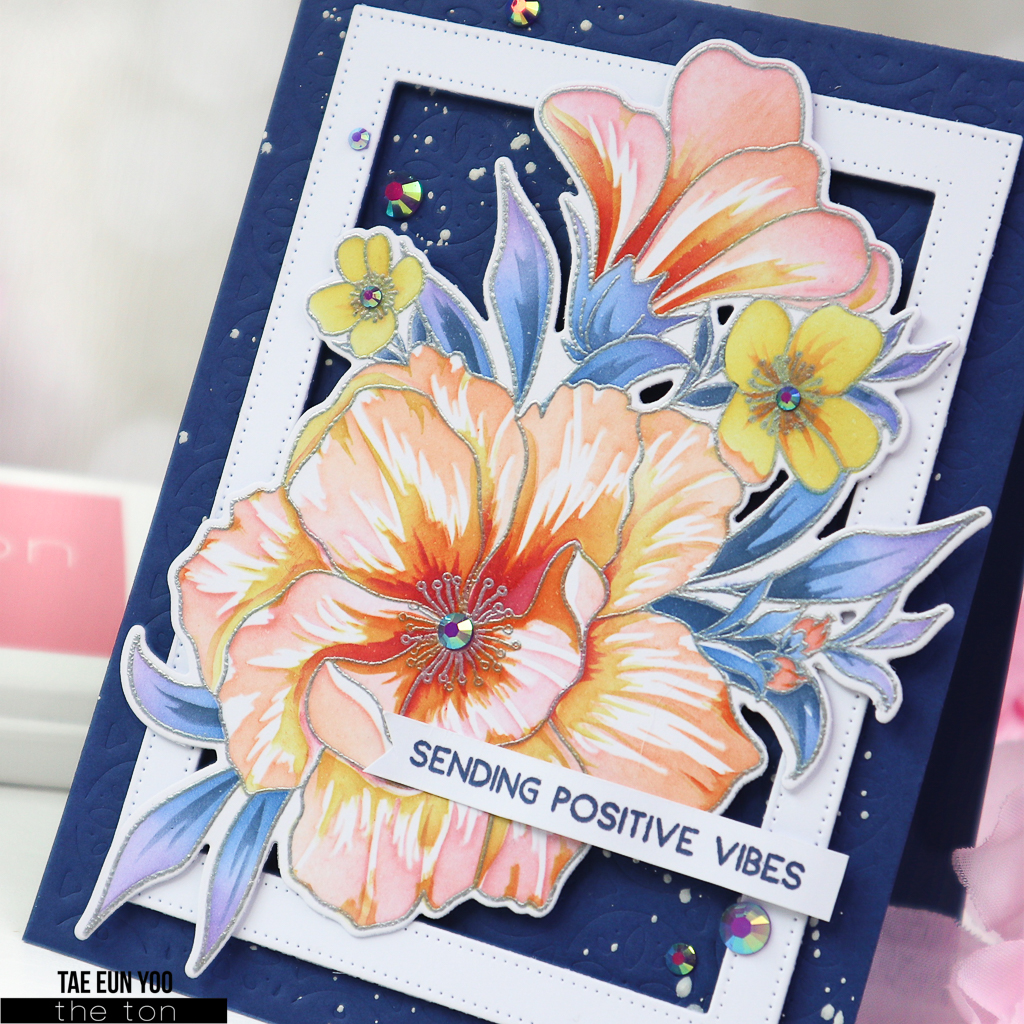
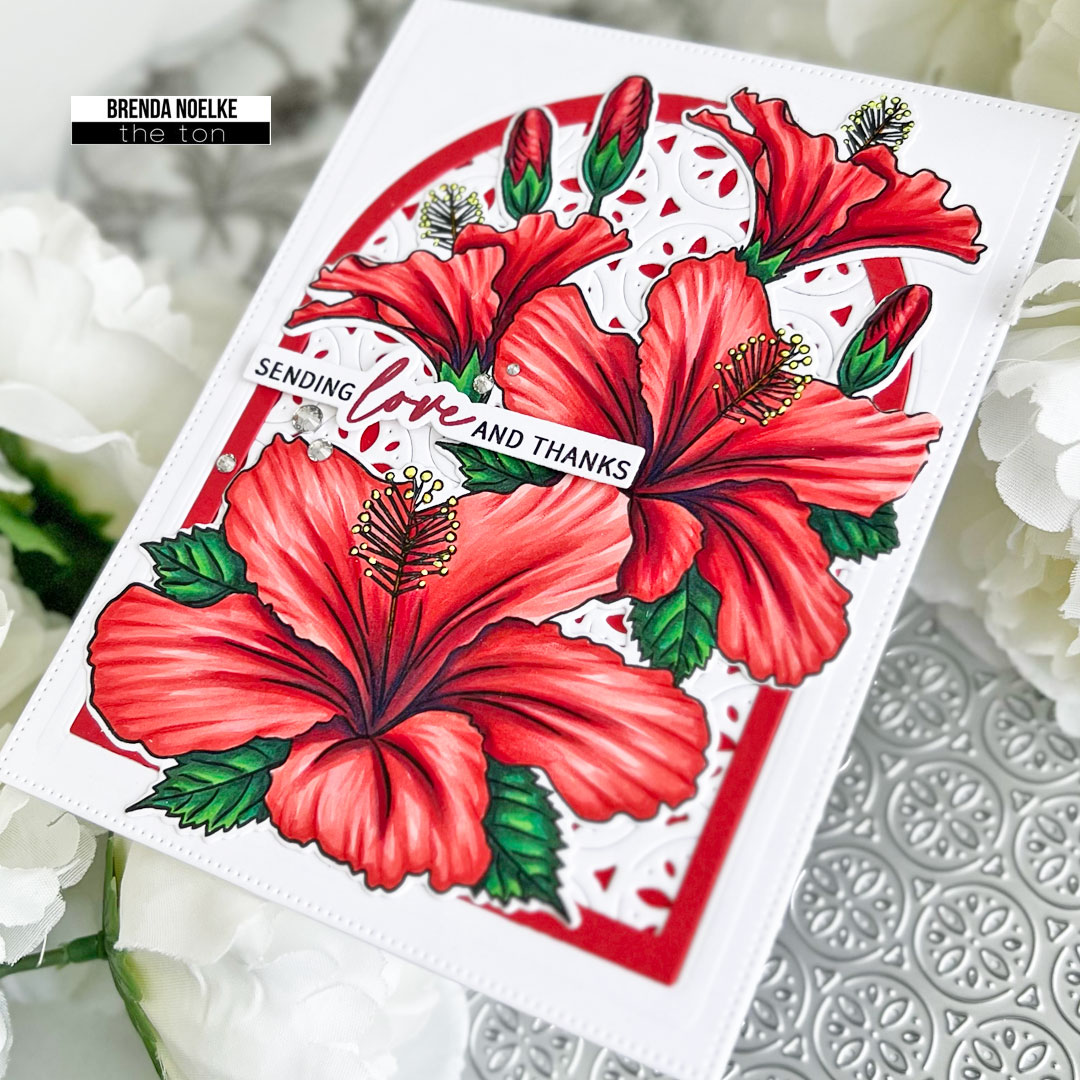
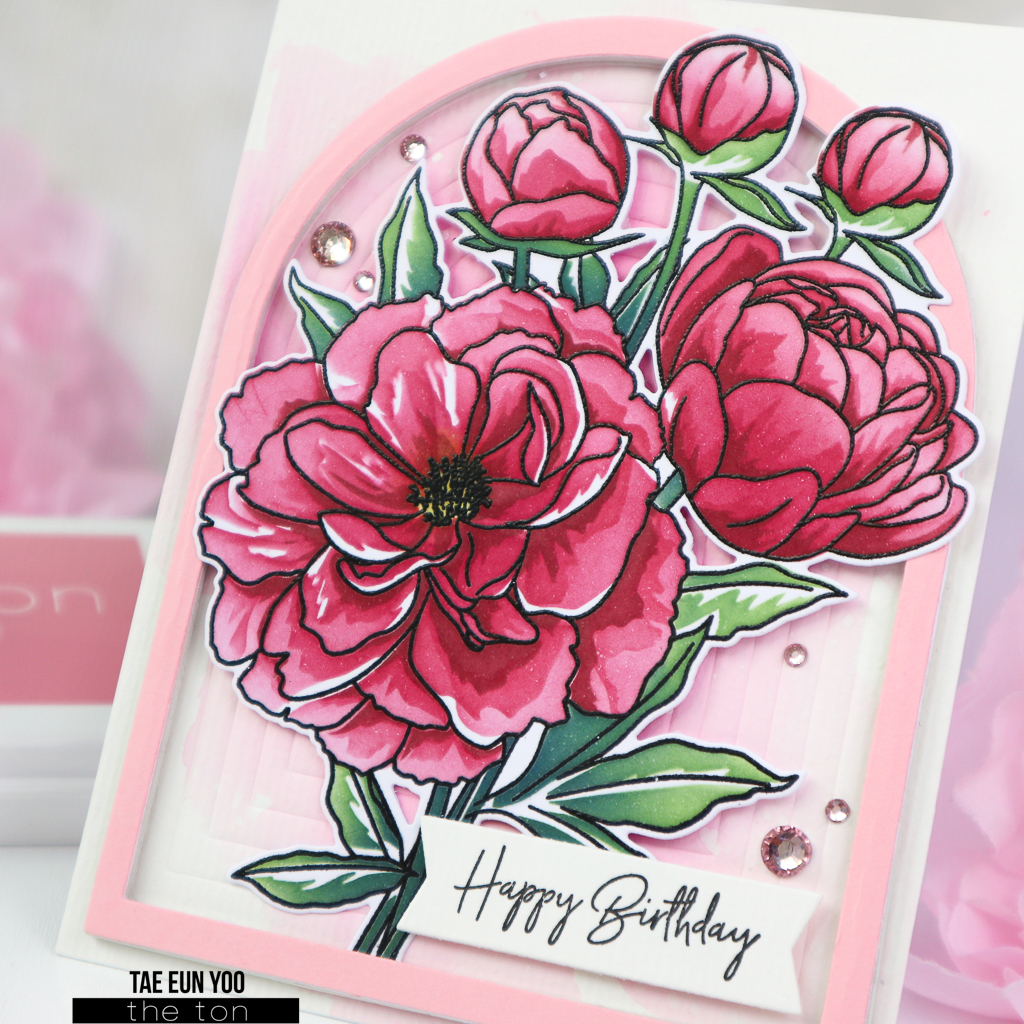
To begin, I stamped the Coming Up Peonies stamp in Noir and again in embossing ink, then heat embossed the image using clear embossing powder. I love the added shine of the clear embossing, and it eliminates the risk of ink smudging.

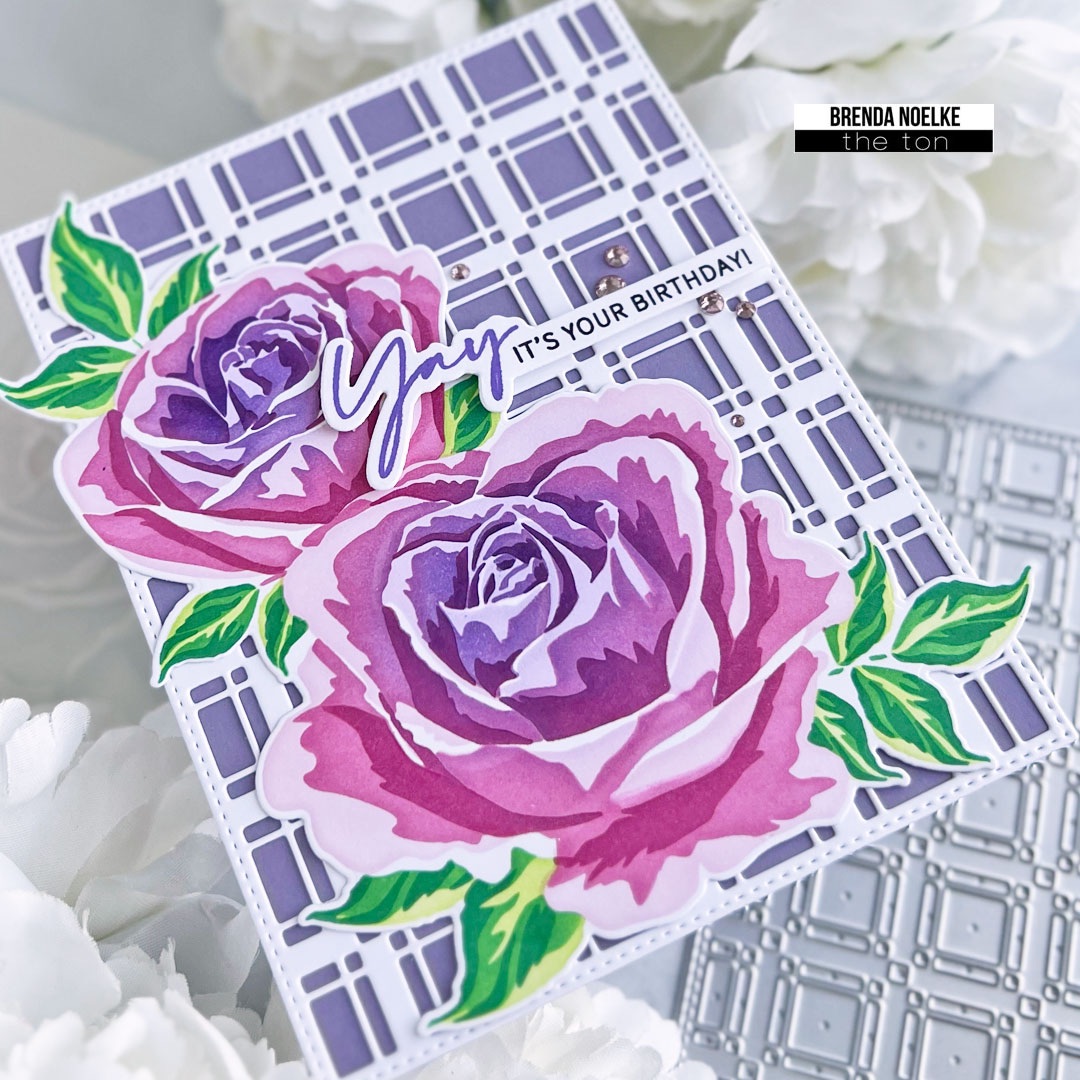
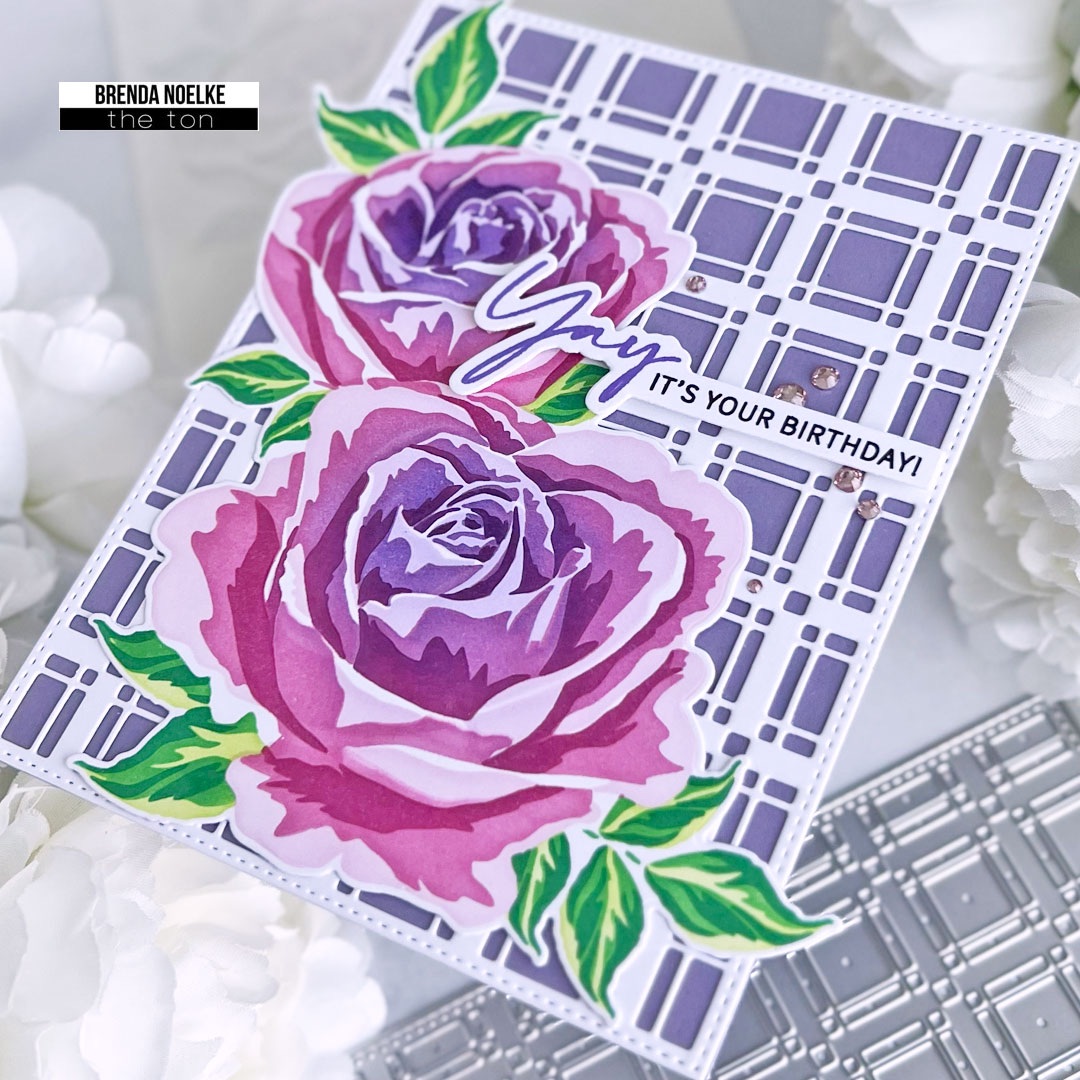
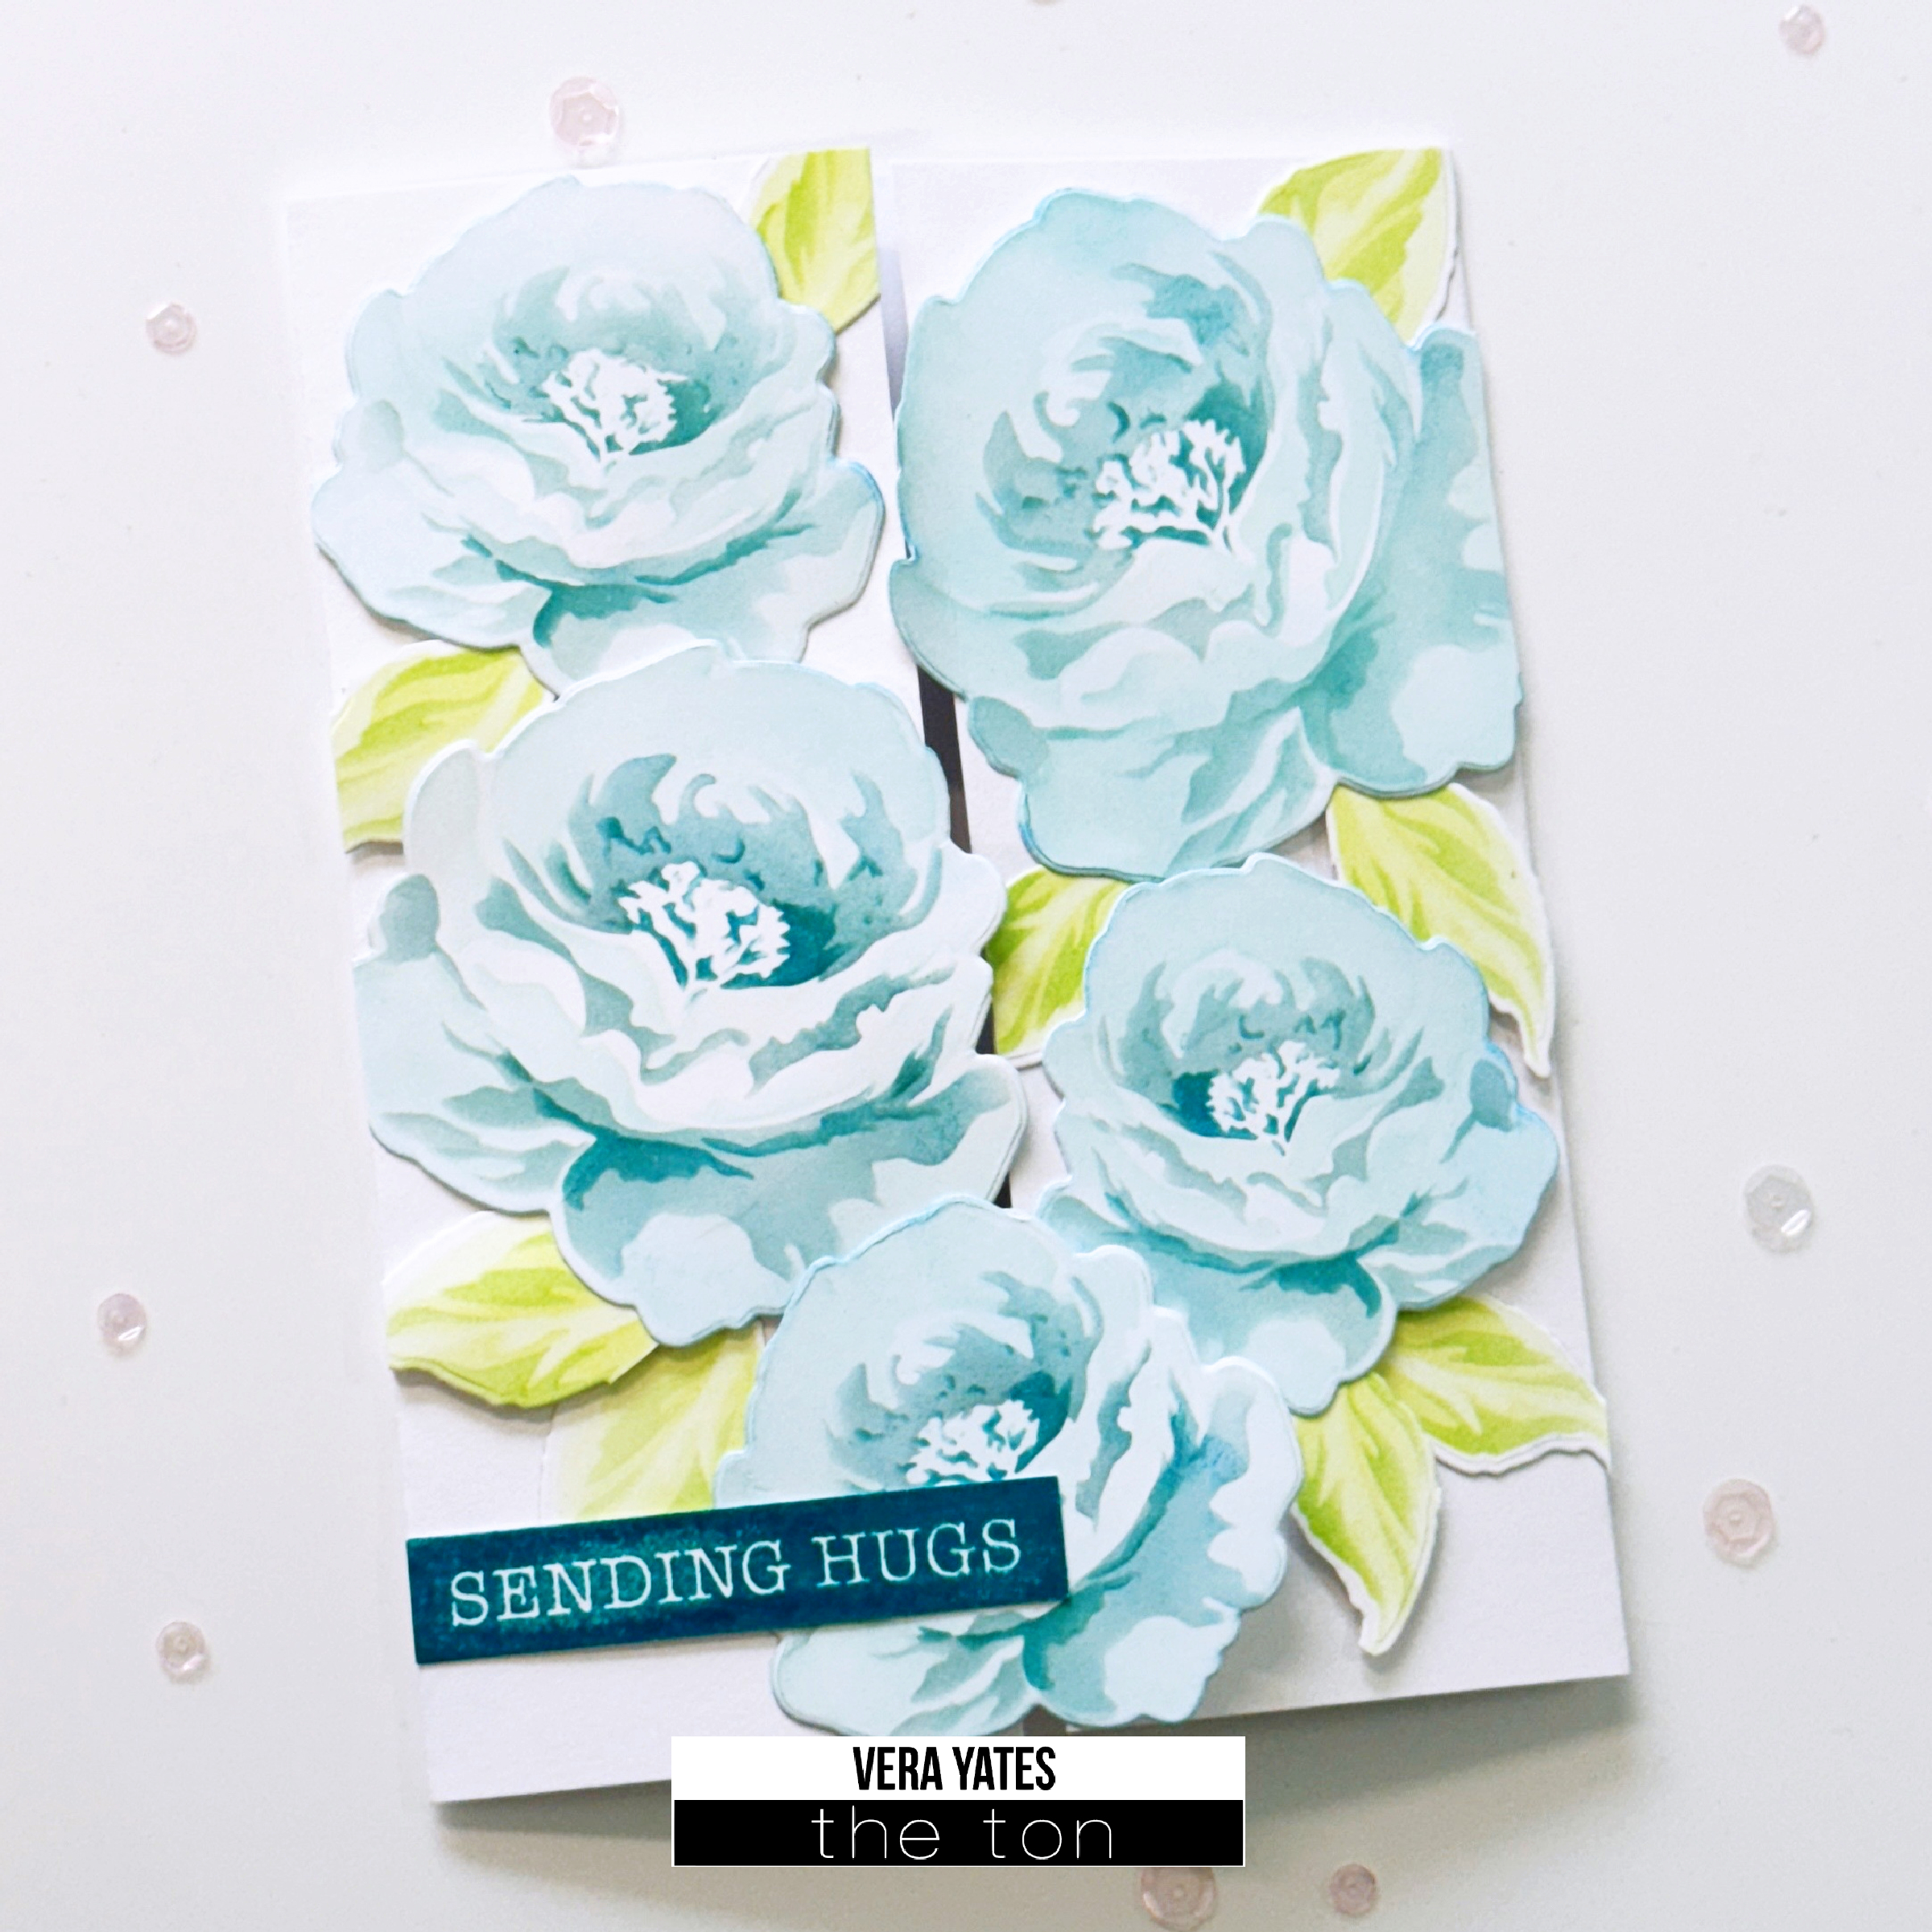
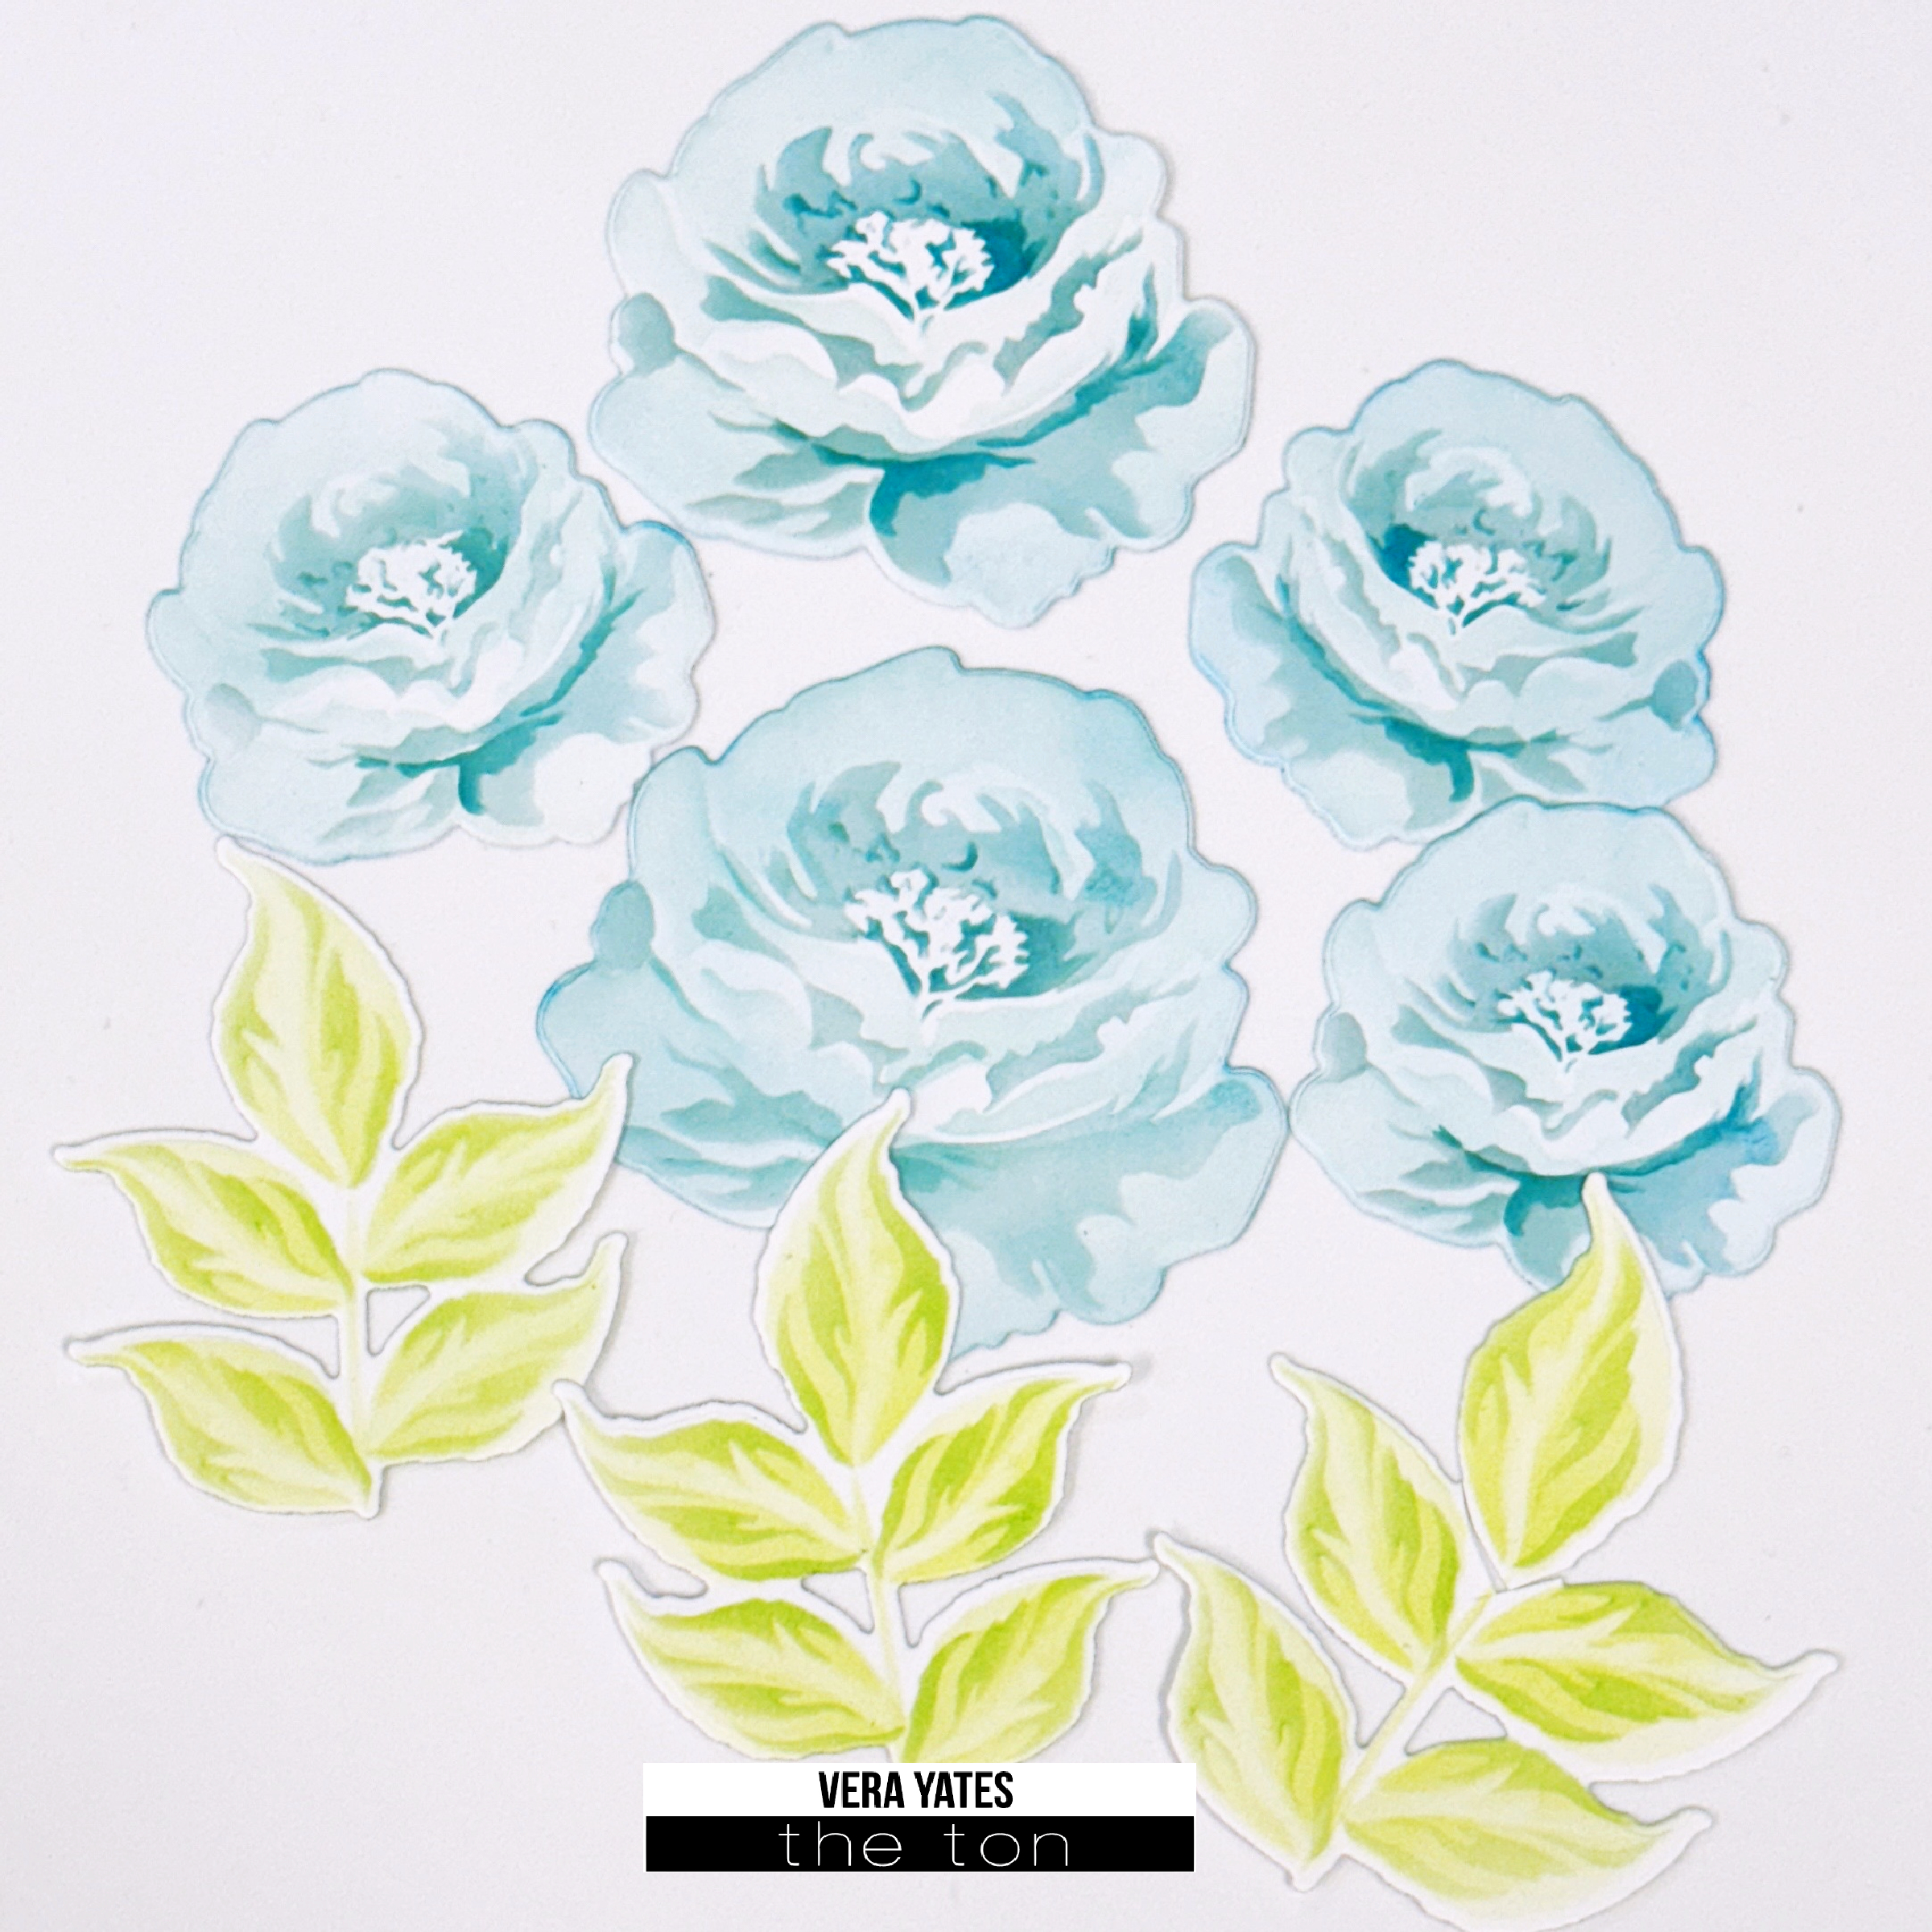
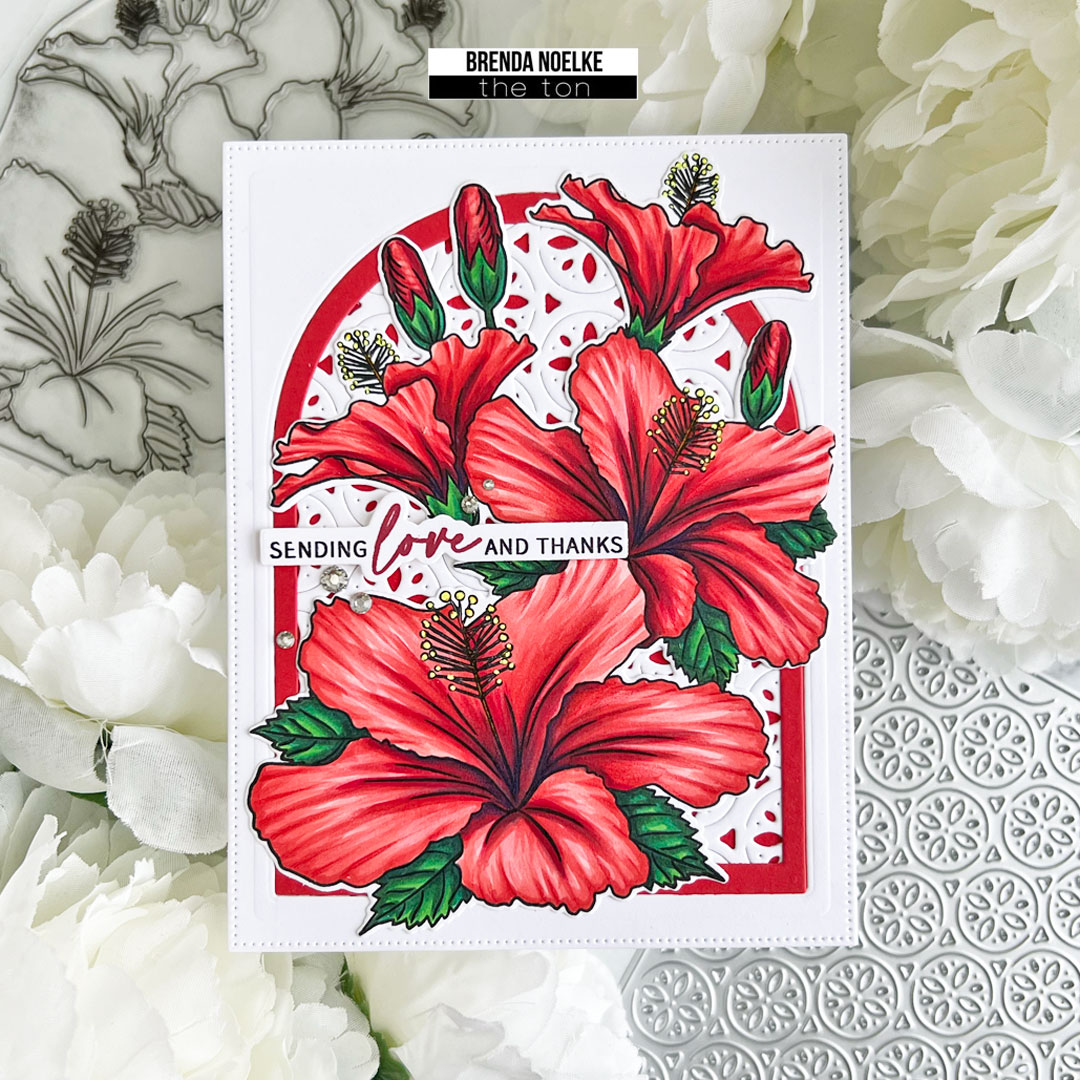
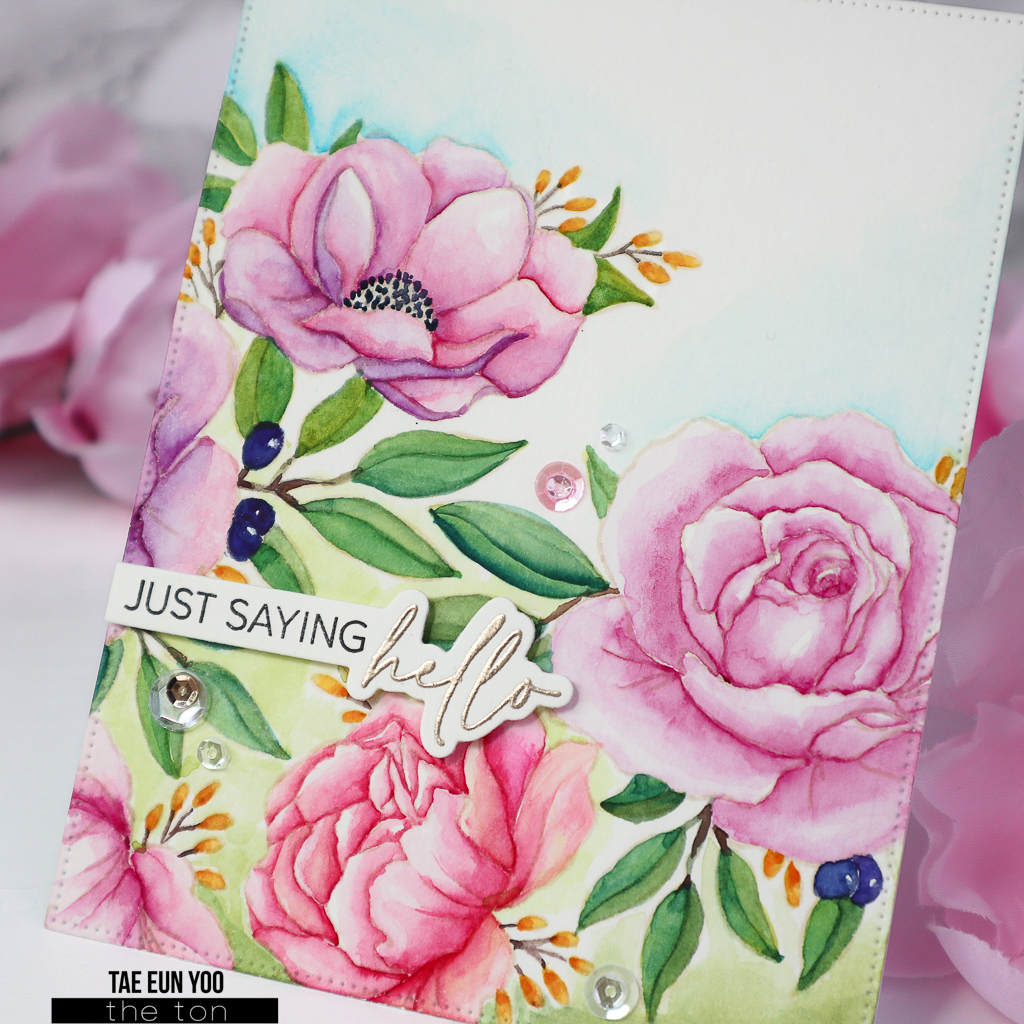
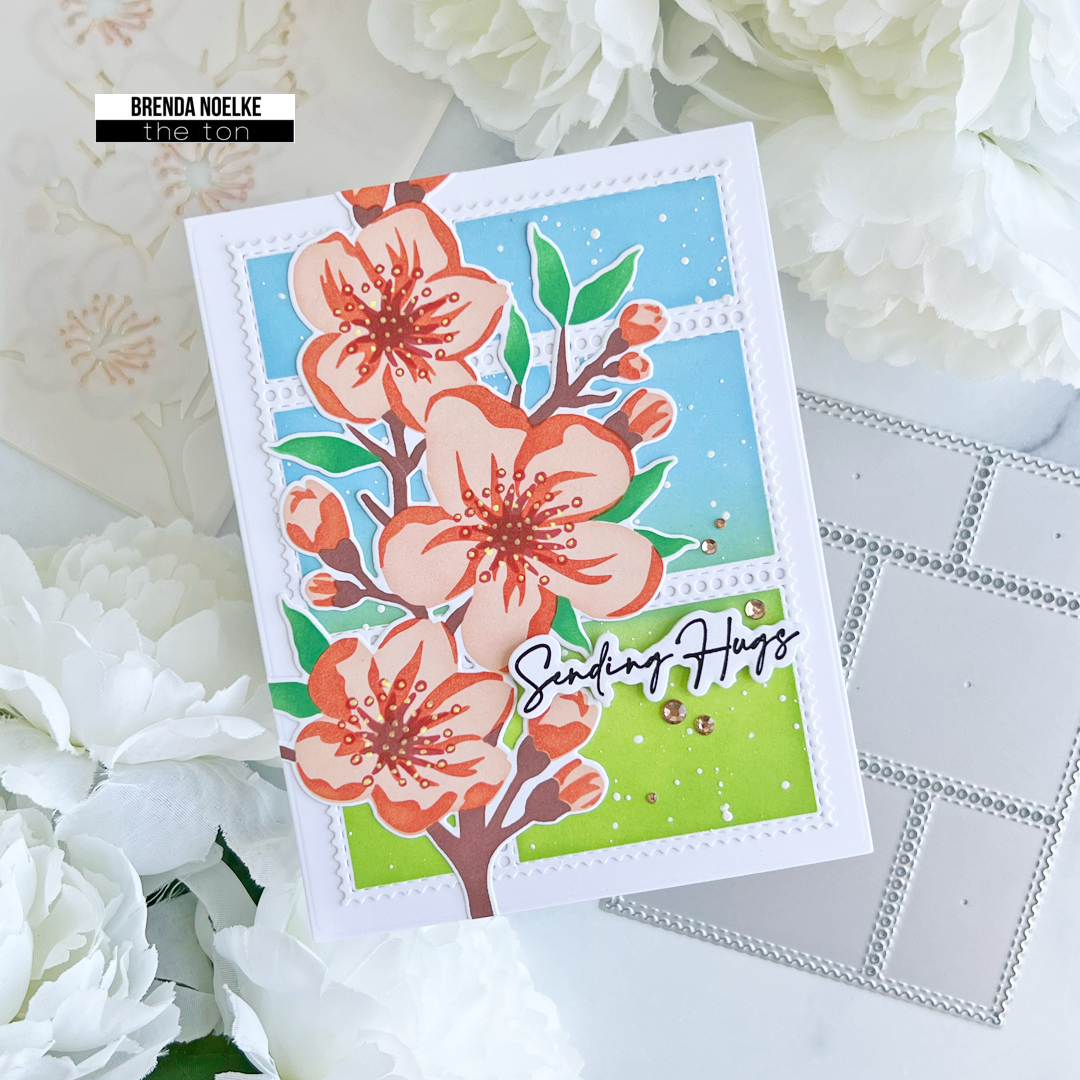
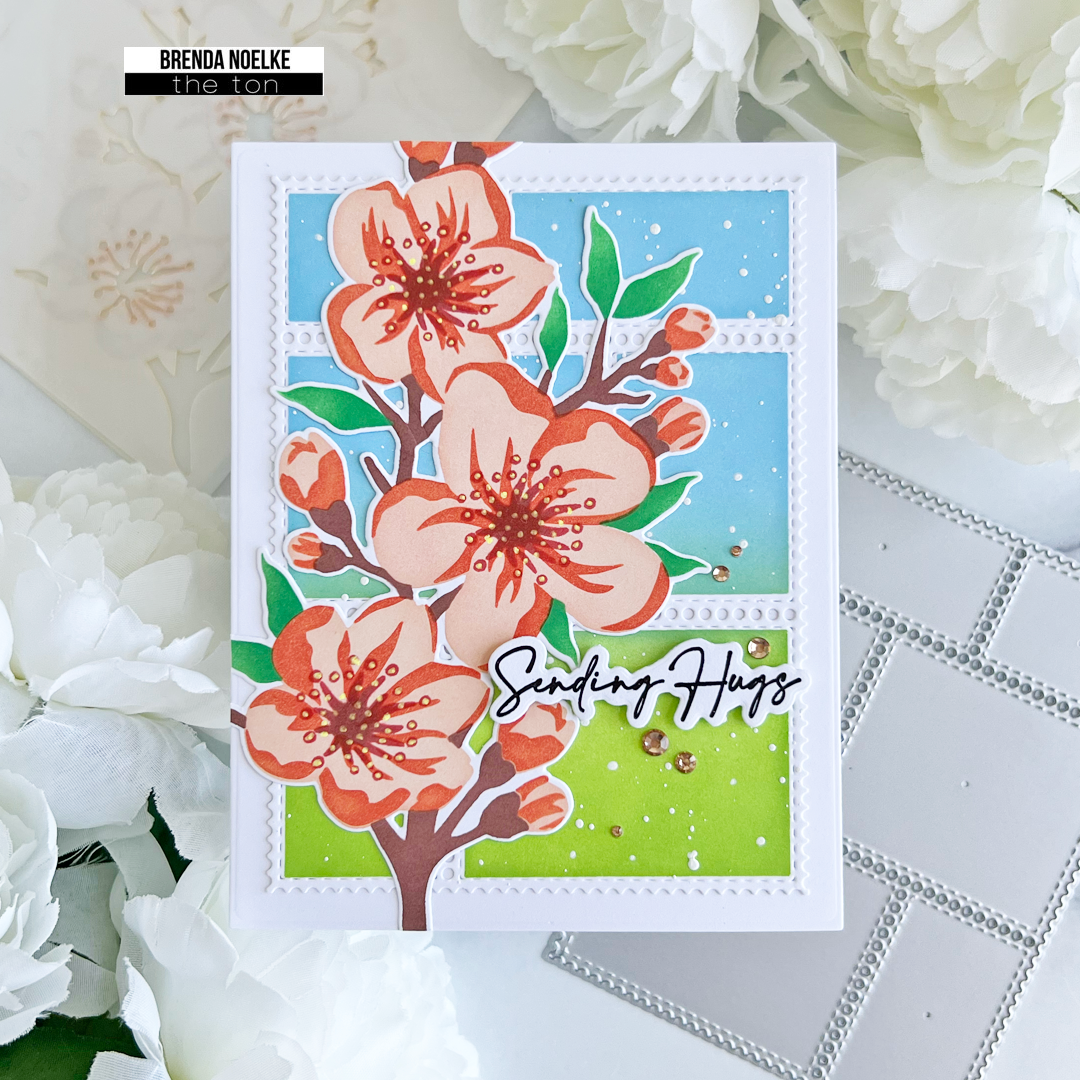
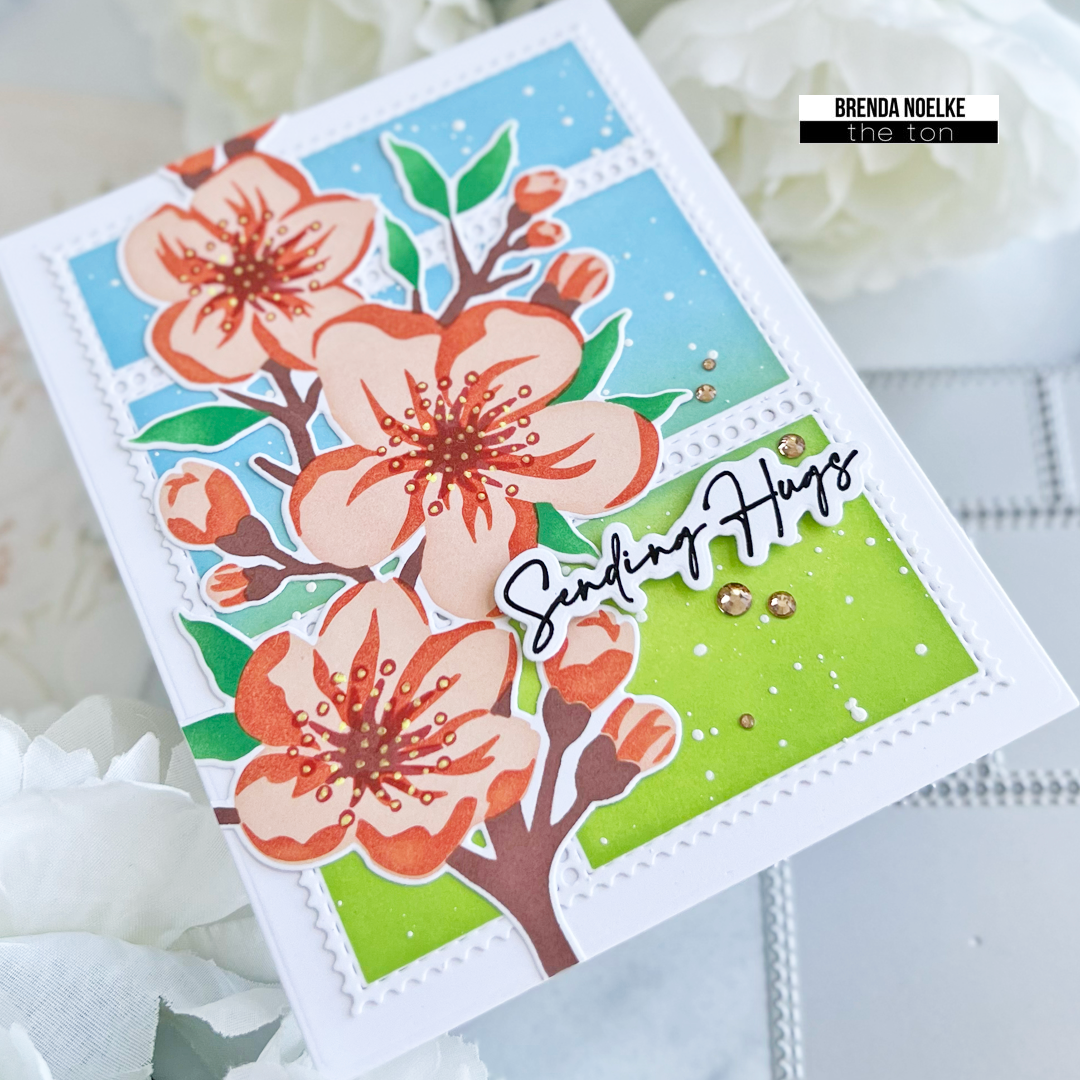
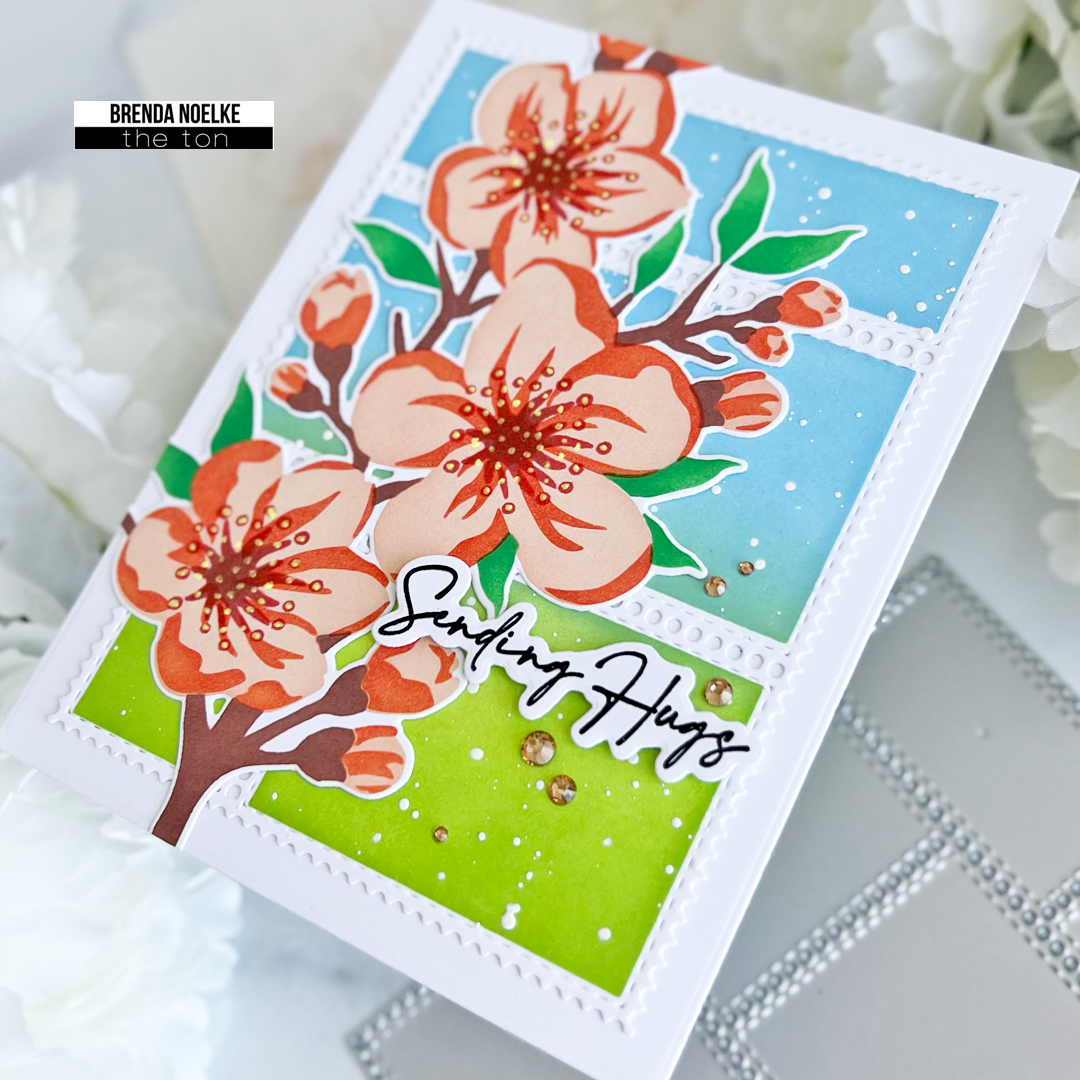
I stenciled the image using the Climbing Peonies layering stencils. For the first layer, I used Bubblegum and Lipstick Red, for the second layer, Deep Peony and Cherry, and for the third layer, Wine. The leaves were stenciled in Matcha first, and I added a bit of dark shade using Italian Denim.

Once done with the stenciling, I cut the image using the coordinating die and set it aside.

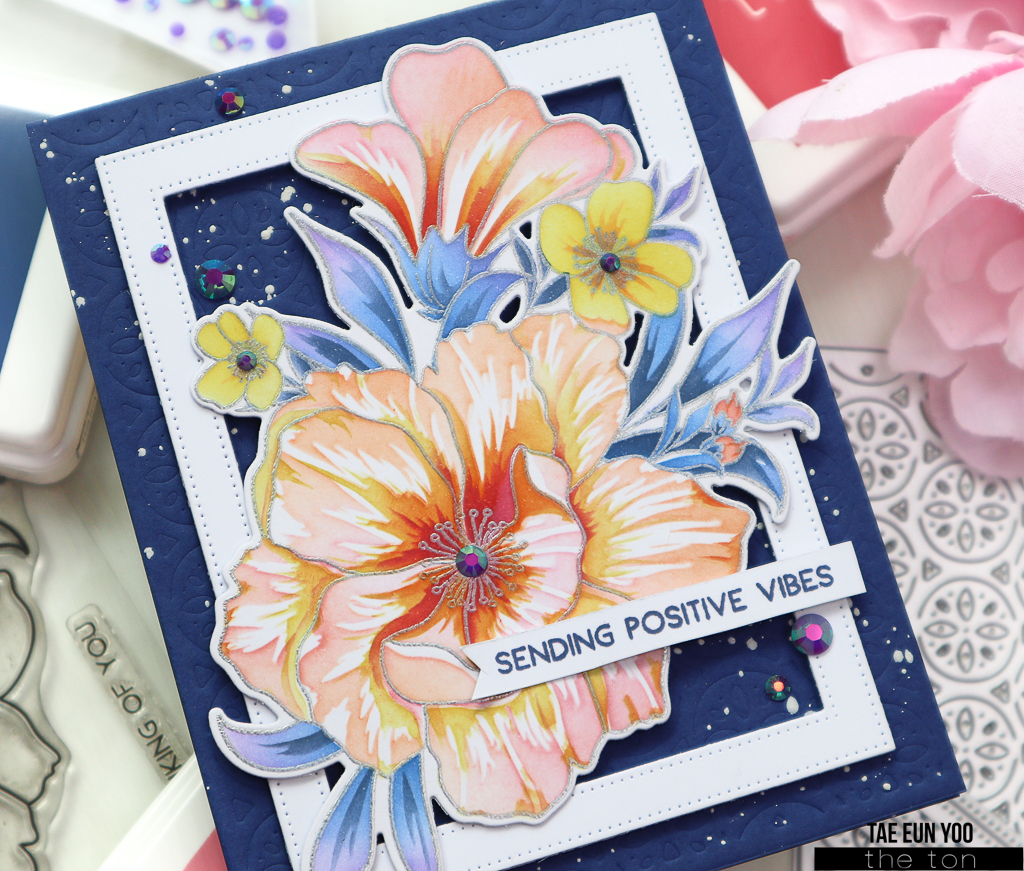
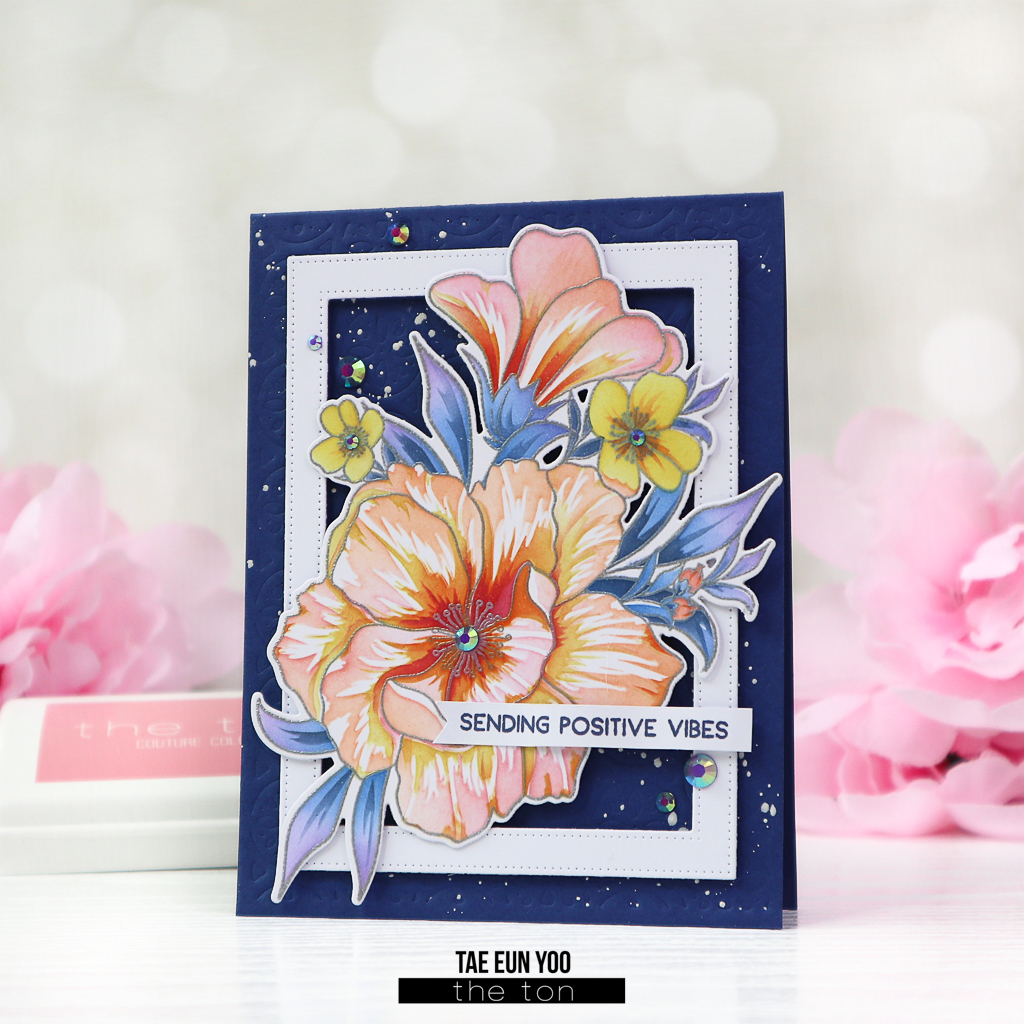
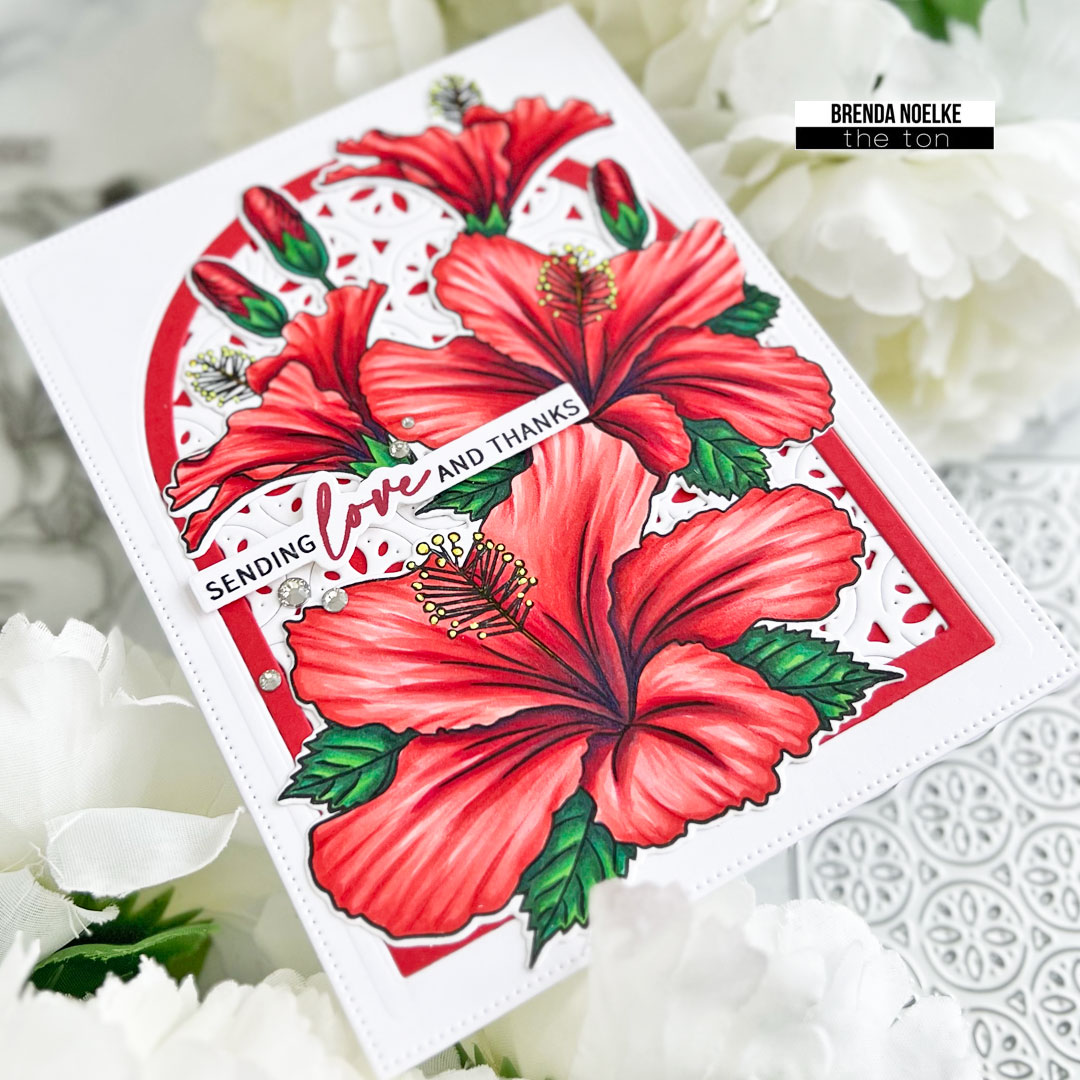
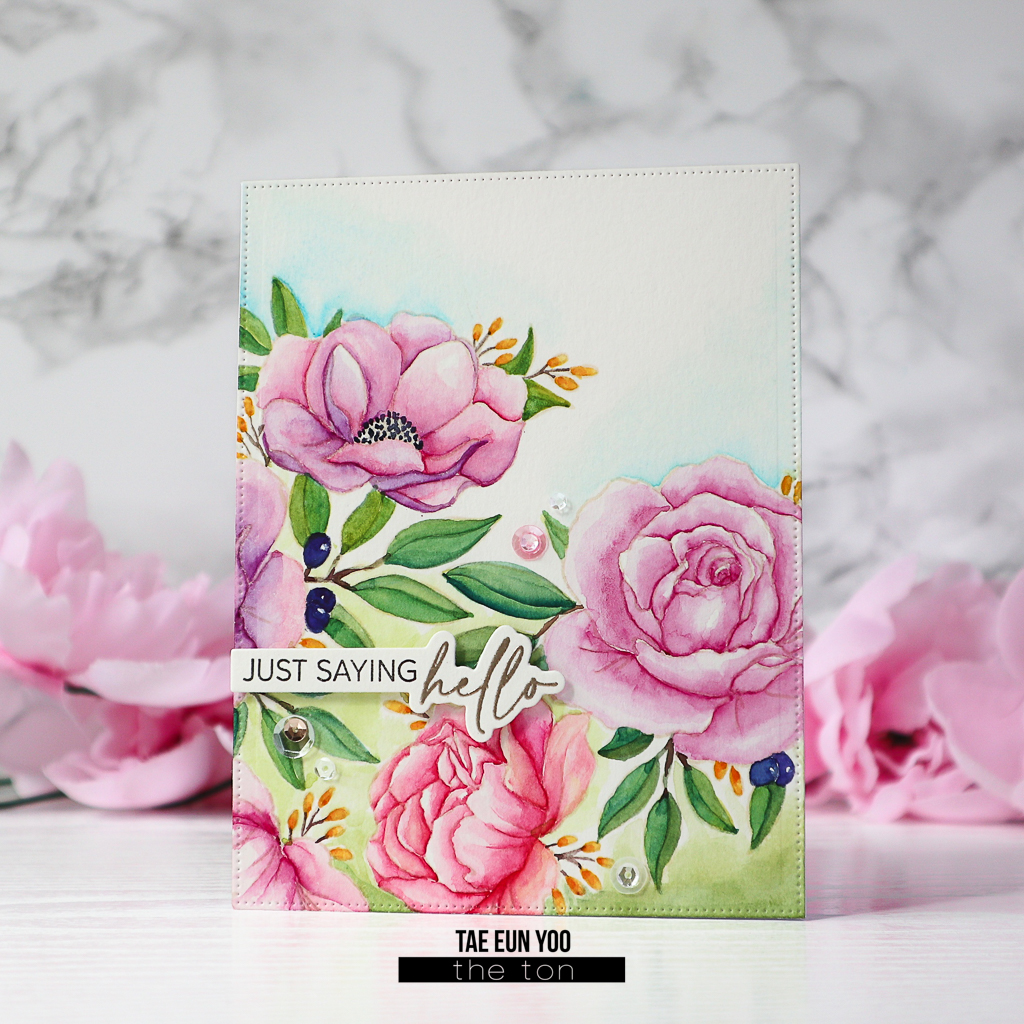
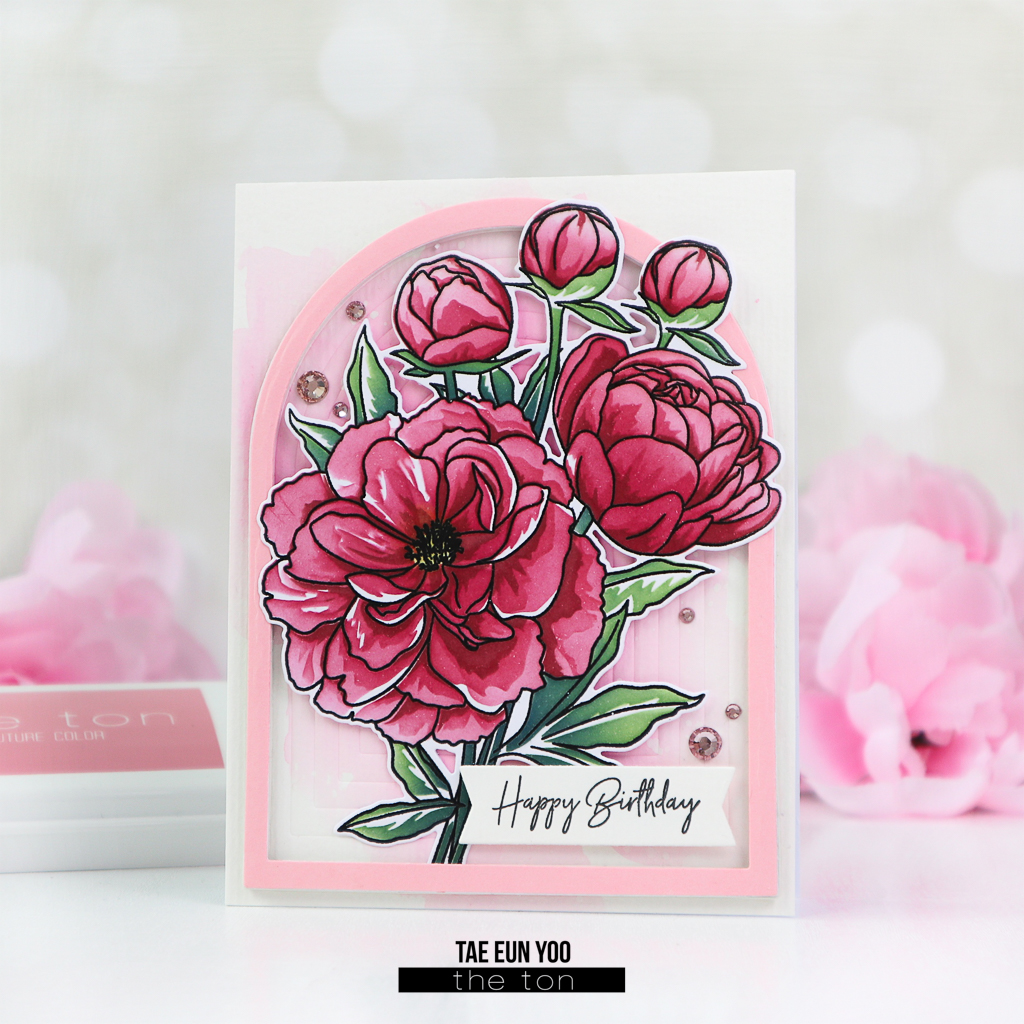
To create the background, I started by creating a watercolored background panel. I loosely watercolored a watercolor paper panel in pink, let it dry, and dry embossed it with the Dome Frames Slim Borders coverplate die. Next, I splattered white opaque ink on the panel and adhered it flat on a white cardbase. 

I cut a frame using the Dome Nested dies from some soft pink cardstock and white fun foam, adhered the foam frame under the pink frame, and added it to the card.

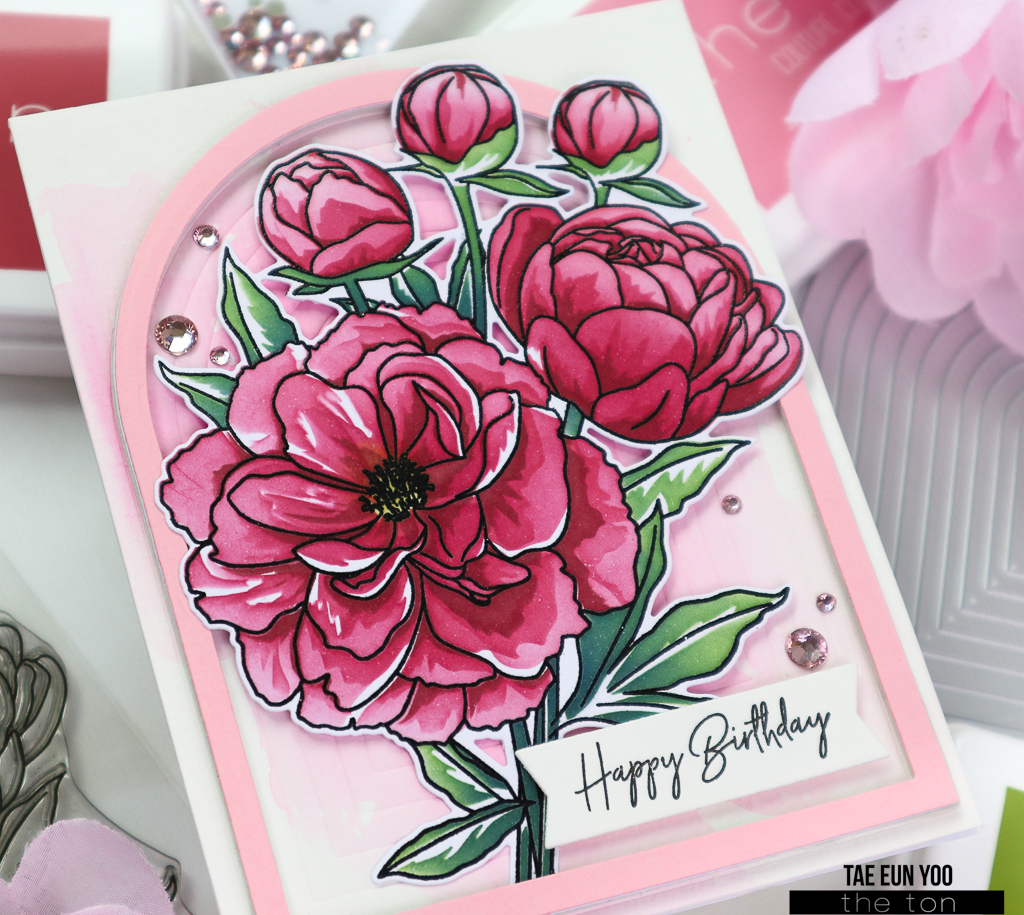
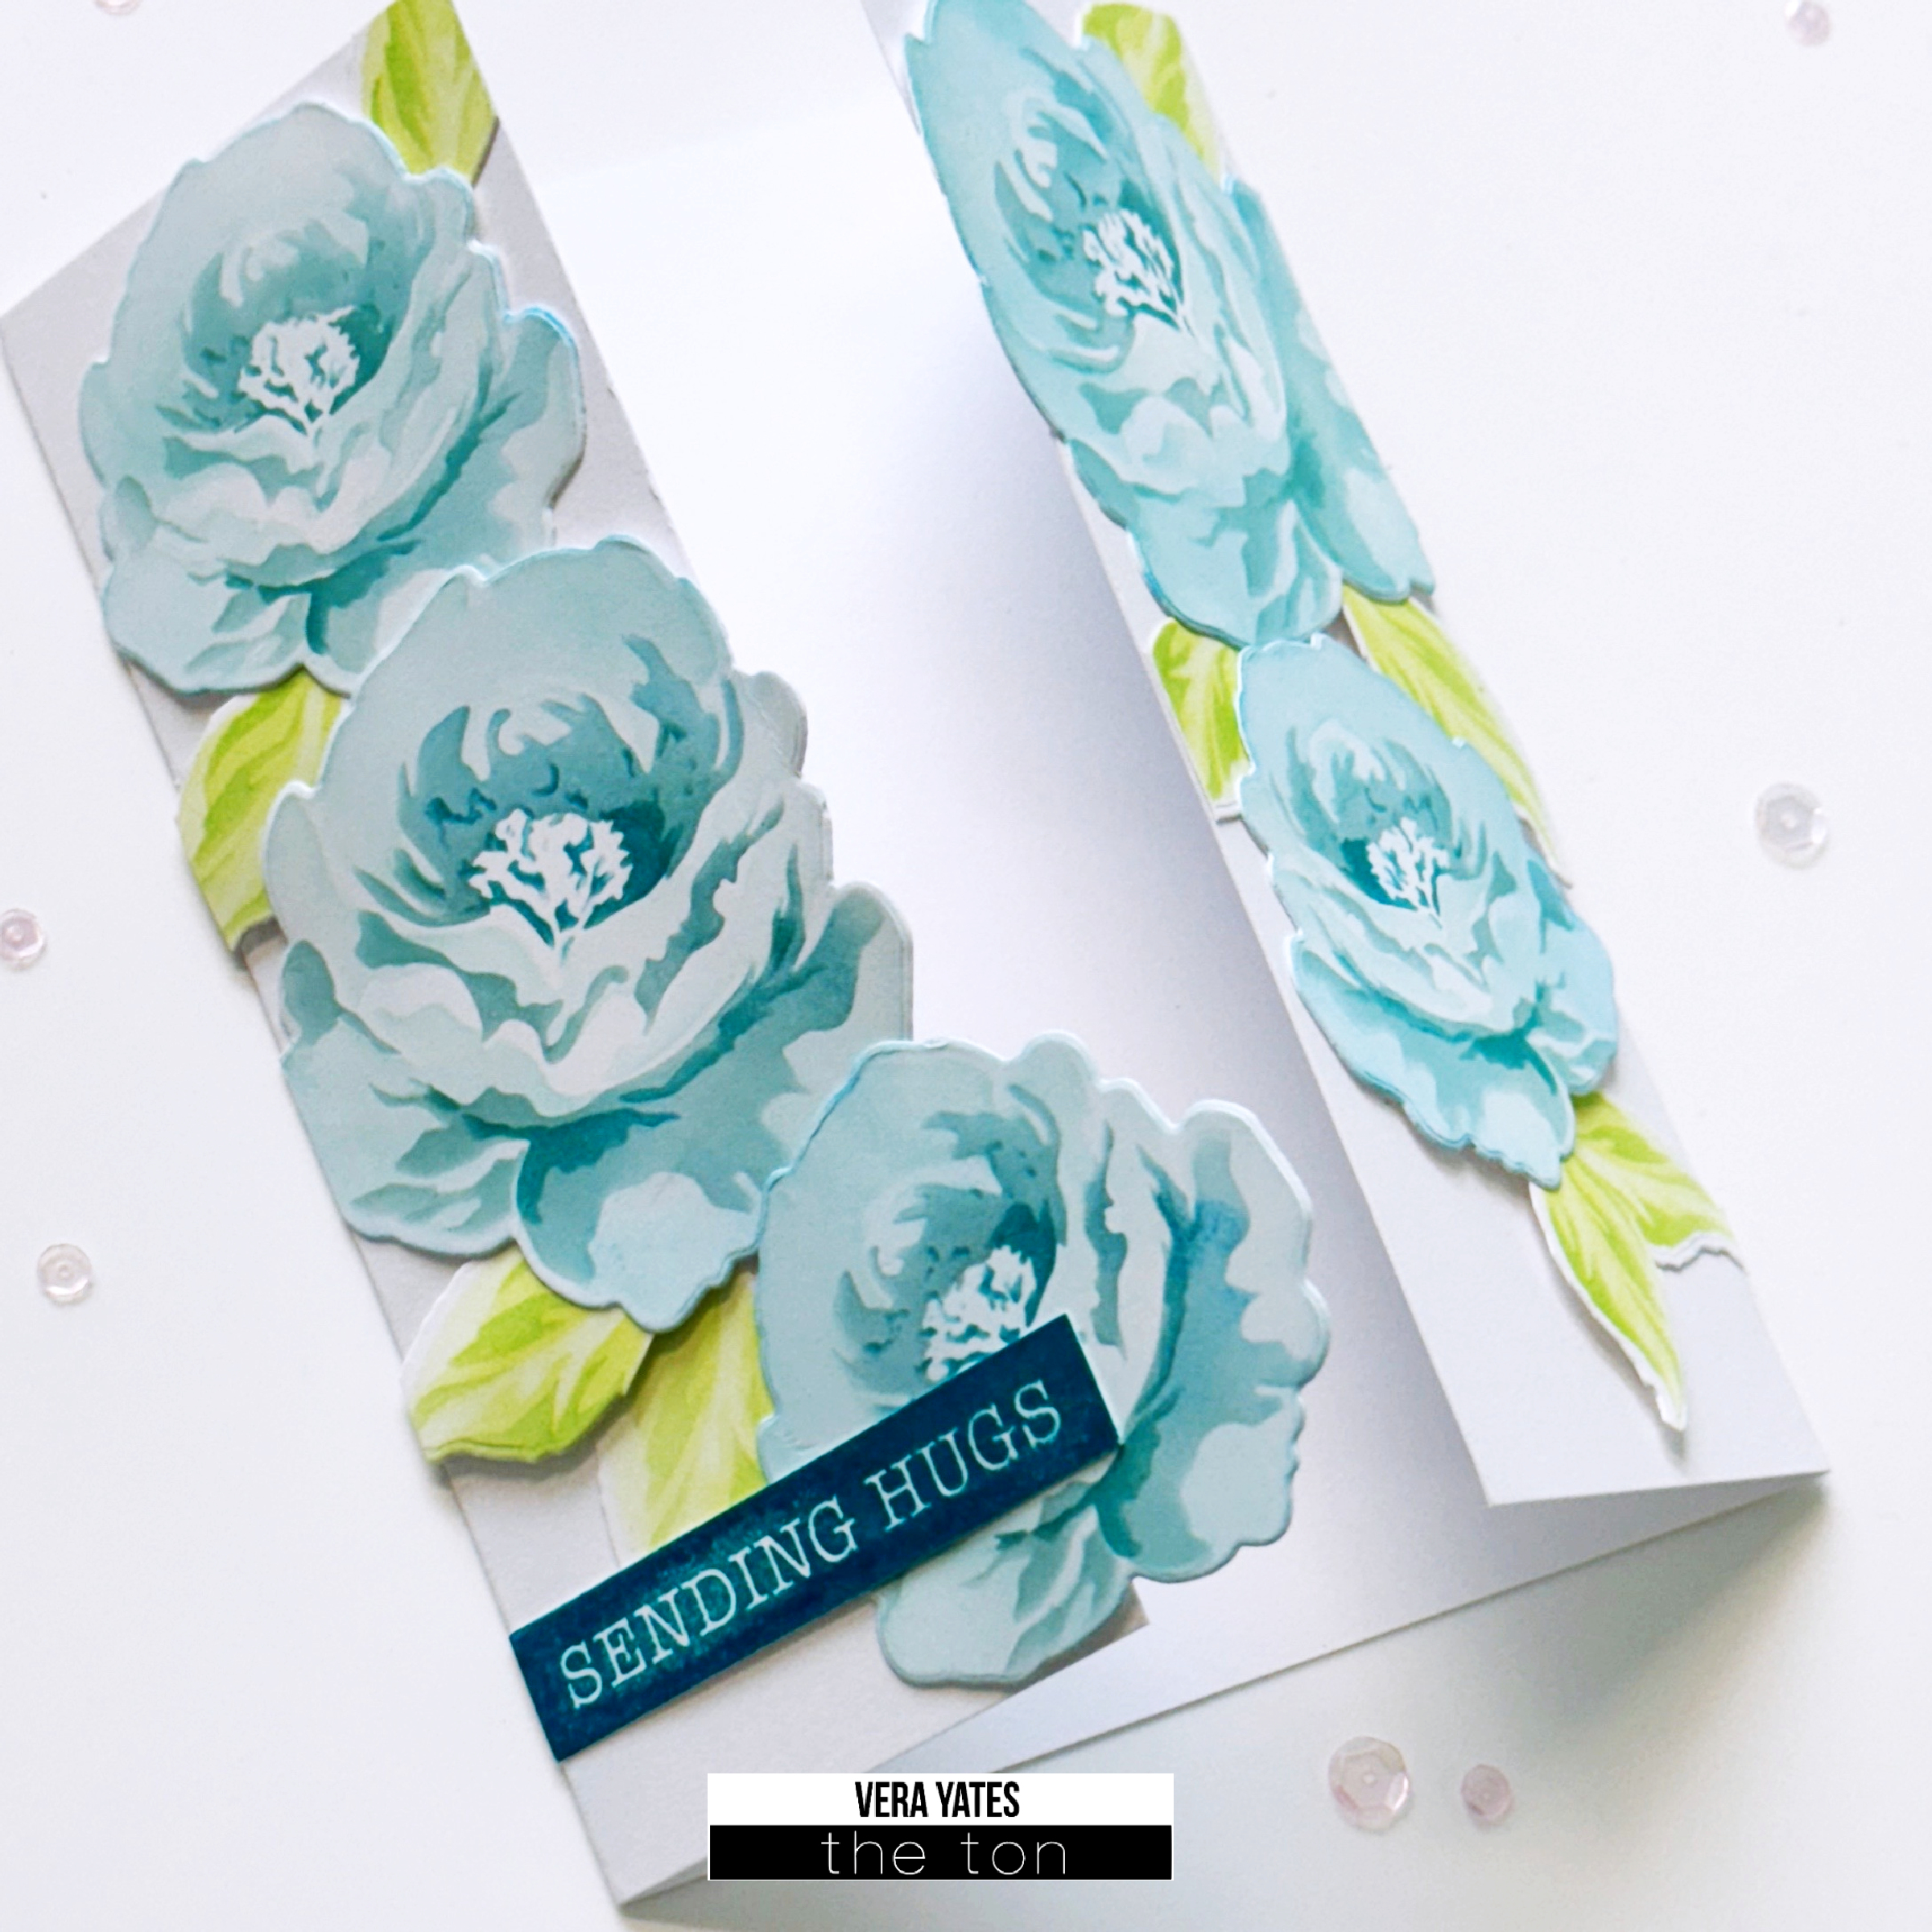
I added the floral image into the dome frame using foam tape. The sentiment is also from the Coming Up Peonies stamp set. I stamped it in Noir and cut it using the Quick Labels die

To finish off, I scattered a few Soft Pink Gems

That’s it from me for today! I hope you could find some inspiration from my card!

Thank you so much for looking!

TaeEun

Lily Hugs

Hi friends. Vera here. As it’s been my goal this year to use more and more of older stamp and dies set, for today’s post I am practicing this effort. Today, am showcasing an older set that I still love to this day, the Lily Trio Layering Coverplate die.

There are 4 layer of this lily trio and I die cut each layer out of white cardstock, except for the top outline layer, which I used gold cardstock. I ink blended Hollywood Star on the 1st base layer, then Deep Peony for the 2nd layer and finally Iris Blooms on the 3rd layer. For the flower buds I used Soft Garden and Bright Emerald.

Carefully glued all the layer together. When that done, I decided to trim the frame part as I just want to use the flower part. I think it gives a softer effect by trimming the frame. Adhere to card base.

Finish the card by heat embossing one of the sentiment from Rose Labels set. Pretty quick and easy, but packing quite a punch if I may say so. 🙂 How often do you play with the older sets on your stash? I think when a set is gorgeous, it’s easy to get inspire to use the sets again and again even after a few years. I hope somehow in my little way, I get to inspire you to reach out to your older sets and create. That’s all I have for today> May your week starts off in a good way. Cheers….

Yay It’s Your Birthday – Rose Duo

Hello, fellow crafters!! I hope your week is goin well!! Brenda here with a floral birthday card to share with you today!!

I began by stenciling the Rose Duo Stencil Set onto white cardstock with Rose Quartz, Softy Amethyst, Hollywood Star, Iris Blooms, Cosmopolitan Pink, Grape Crush, Soft Garden, Bright Fern and Deep Emerald inks. I used the Coordinating Die to cut it out.

Next, I die-cut the Single Plaid Coverplate Die from white cardstock and layered it over a panel of dusty purple cardstock. The rose die-cut was adhered with liquid glue.

The sentiment, from the Easy Expressions: Birthday Stamp Set, was stamped with Iris Blooms and Noir inks, then cut out with the Coordinating Die. It was popped up with foam tape. Soft Pink Gems add a bit of sparkle and draw your eye to the sentiment.

Thanks so much for stopping by!! Have a wonderful day!!

Brenda

Fabulous day with Sweet Cherry Blossoms

Hello, everyone! Anna here today sharing a floral card with cherry blossoms.

I started by stenciling the floral images with Sweet Cherry Blossoms Layering Stencils and Soft Cream, Peach Blossoms, Spring Salad (leaves) and Aspen Cocoa inks. I then fussy cut them. To make the background, I die cut a white cardstock panel with Gingham Plaid Layering Coverplate Dies and ink blended Cobalt Breeze on it. Next, I adhered the panel on a white cardstock card base.

I stamped the sentiment using Easy Expressions Birthday stamp set with Noir (but “fabulous” was gold heat embossed) and cut out with Easy Expressions Birthday Coordinating Die. To embellish the card, I added a few rhinestones from Rhinestones Mixed – Seafoam Opaque and Rhinestones Mixed – Metallic Rose Gold Opaque.

Thank you for stopping by! Have a great day!

Anna

Sweet Bouquet Layering Stencils

Hello and happy Friday everyone! It’s TaeEun here today with a stenciled floral card. I stenciled the beautiful arrangement of the Sweet Bouquet set in soft colors and placed it on a dark navy cardbase! 

To start I heat embossed the Sweet Bouquet stamp in silver on a white panel. Next I colored the image in soft colors using the coordinating layering stencil set

I colored the first layer of the flowers in Bubblegum and Peach Blossom, the second layer in Coralline hybrid ink  and the third one in Cherry. For the small flowers I used Lemon drop . The leaves were stenciled in Azurite and Soft Amethyst, and the dark layer of the leaves in Italian Denim. Once done with stenciling, I cut the image with the coordinating die and set it aside.

To create the dark background, I dry embossed the front of a dark navy cardbase using the Sand Dollar coverplate die and splattered white ink on it. After the ink was dry I added a white frame to the cardbase using foam tape, which I cut using two dies from the Double Pierced A2 nested die set. I then foam mounted the Sweet Bouquet image to the card.

The sentiment is also from the Sweet Bouquet stamp set. I stamped it in Italian Denim on a strip of white cardstock and curved it a bit, so that it has some waves, and added it to the card. It’s hard to see the three dimensional waves in the picture, but it adds definitely some interest to the design in real life.

Lastly I scattered a few Dark Purple Opaque rhinestones to finish off.

I love how the dark background makes the lightly stenciled flowers pop!
Thank you so much for stopping by today! Hope you could get some inspiration from my card 🙂 !

Have a crafty weekend!

TaeEun

Peonies Unlocked

Hi peeps. Vera here. Today, I decided to create double fold card with center opening. Now & then I need to remind myself to do something different and I have to say it’s refreshing to do so. After looking at my stash, I went with Peonies Unlocked Layering stencil set.

I start by ink blending Hot Tourmaline, Ocean Teal for the peonies, Soft Garden and Spring Salad for the leaves. Once I finished with the coloring, die cut the pieces using Peonies Unlocked Coordinating dies.

The card is the standard 4.25 x 5.50 inch card and simply arrange all the pieces on the card base. Make sure not to put any adhesive on the part that overlap to the other panel. I also used foam adhesive on the middle of the flower parts to create dimension. Trim any excess part and finish by stamping sentiment from Rose Labels set with Hot Tourmaline . Quick and simple without being too simple. 🙂

Short and sweet today, peeps. I hope you enjoy today’s card and I wish you all a lovely week. Cheers…

Sending Love and Thanks Hibiscus

Happy Monday, crafty friends!! I hope you had a great weekend!! Brenda here with a card that I created for my mom!! She always gives my husband and I a plant every year for our anniversary (April 26)!! This year she gave us the most beautiful red hibiscus!! I was so inspired and decided to create a thank you card for her with the Coming Up Hibiscus Stamp Set!!

I stamped the Coming Up Hibiscus Stamp Set onto white cardstock with Caviar Ink. I colored it with Copic markers, added details with colored pencils, then used the Coordinating Die to cut it out. I also added dots to the stamen with a yellow gel pen.

For the background, I die-cut the Sand Dollar Coverplate from white cardstock and adhered it over an A2 panel of red cardstock. Next, I die-cut another panel of white cardstock with the largest die in the Double Pierced Rectangle A2 Nesting Die Set and the second largest die in the Dome Nested Die Set. I adhered it over the coverplate background, then added a frame that was cut from red cardstock using the Dome Frames Slime Borders Coverplate Die. The hibiscus die-cut was adhered to the background with liquid glue.

The sentiment, from the Easy Expressions: Thanks Stamp Set, was stamped with Noir and Lipstick Red inks, then cut out with the Coordinating Die. It was popped up with foam tape. I added Diamond Gem Rhinestones to finish it off and add a bit of sparkle.

I really love how this turned out!! I hope my mom does, as well!!

Thanks so much for stopping by today!! Have a wonderful week!!

Brenda

Darling Daisies Lovely card

Hello, everyone! Anna here today with a floral card I made using Darling Daisies Layering Stencils.

I started by stenciling the floral image with Evergreen, Raw Sea Glass and Basil Mojito (background), Everglade Moss (leaves), Soft Ash, Amber Citrine and Found Topaz (flowers) inks. The sentiment is from Ribbons Affirmations. “Lovely” was heat embossed in Glitter Gold, but the second layer was stamped in Found Topaz. I cut out it with Ribbons Affirmation Coordinating Die. “Hello” was stamped in Noir on the vellum circle that was cut out using Double Pierced Circle Nested Dies.

Next, I added a few rhinestones from Rhinestones Mixed – Gold Rainbow Opaque to embellish the card.

That’s all from me today. Thank you for stopping by!

Anna

Bonny Blooms – Watercoloring

Hello everyone! Hope you’re having a great week so far! It’s TaeEun here today with a watercolored floral card. I did no line watercoloring of the beautiful outlined floral images from the Bonny Blooms set. This is a floral cluster image with three beautiful large flowers: a peony, a rose, and an anemone. 

I stamped the image in Soft Cream two times on a watercolor paper panel, filling two thirds of it , as shown in the picture and started watercoloring the image. I had a blast watercoloring the large flowers, mainly in Quinacridone magenta and Rubin red, and a bit of violet. 

After I was done watercoloring the images, I also colored the background loosely in green and light blue and let the panel dry. 

I cut the panel using the Double Pierced Rectangle A2 Nested die and adhered it to a white cardbase. 

The sentiment is from the Easy Expressions: Just Because set. The scripty part was heat embossed in Liquid Platinum, and the rest was stamped in Noir. I cut the sentiment using the coordinating die and added it to the card using foam tape.

I finished off the card with a few sequins from the Pink Bokeh couture Mix and Glass Slippers.

Thank you so much for stopping by today!

Have a crafty day!

TaeEun

Sending Hugs – Sweet Cherry Blossoms

Hello, fellow cardmakers and crafters!! Brenda here with a “sending hugs” card featuring several products from the latest release!! I love creating cards with this sentiment!! It’s so versatile and can be used for so many occasions…everything from birthday to sympathy!!

I started by stenciling the Sweet Cherry Blossoms Stencil Set onto white cardstock with Peach Blossom, Coralline, Coral Cavern, Spiced Chai, Aspen Cocoa and Bright Fern inks. I added dots to the centers of the flowers with a yellow gel pen, then used the Coordinating Die to cut it out.

For the background, I die-cut the Postage Party Die from white cardstock and stenciled the Postage: Window Stencil onto it with Cali Blue and Soft Garden inks. I splattered it with diluted white gouache and adhered it to a white A2 card base, once it was dry.

The sentiment, from the Easy Expressions: Just Because Stamp Set, was stamped onto white cardstock with Noir ink, cut out with the Coordinating Die and popped up with foam tape. Rose Gold Rhinestones add a bit of sparkle. They’re the perfect shade of peach!!

I’m really into peach right now and this color combo makes my heart happy!!

Thanks so much for stopping by today!! Have a wonderful weekend!!

Brenda